
One of the current technologies that can be scary to start working with is Kubernetes. However, like anything, the more you work with it and learn the ins and outs of the solution, the more comfortable you will become working with it in production. One of the best ways I have found with getting familiar with various technologies is bringing them into my home lab and working with them without the fear of bringing down production environments. Also, you can start making use of the technologies as “production technologies” in your home lab and understand how to manage them and troubleshoot when problems arise.
This guide will walk you through setting up a Kubernetes cluster at home. We will cover various Kubernetes solutions that are easy to get up and running, like Microk8s, Minikube, k3s, Docker Desktop Kubernetes, and Rancher Desktop. These form a great basis for a Kubernetes homelab and can help to sharpen your skills with them. Let’s dive in
Why Build a Kubernetes Home Lab?
Well, we have already touched on this. Building a Kubernetes homelab is a great way to sharpen your skills and become familiar with the tech stack that is Kubernetes. Bringing these into a lab environment allows testing configurations, playing around with containerized apps and exploring K8s without the fear of bringing anything down. In short, it provides practical hands-on experience.
Note the following use cases to take advantage of:
Running Containerized Applications
Kubernetes allows you to run containerized applications in a highly available way. You can also use your home lab Kubernetes cluster to test different deployments like rolling updates and blue-green deployments.
CI/CD Pipelines
You can learn how to use your Kubernetes home lab with CI/CD tools like Jenkins or GitLab CI to automate application deployment and testing.
Learning
Probably the strongest use case is learning. Use your Kubernetes home lab to learn features, test configurations, and experiment.
5 Kubernetes Home Lab Distributions that make sense
To get started with Kubernetes there are actually several really great solutions that can allow you to get started even with single-node Kubernetes distributions to start working with a Kubernetes cluster without really having the tasks of Kubernetes cluster setup with multiple Kubernetes nodes.
Let’s look at the following 5 solutions:
- Microk8s
- Minikube
- k3s
- Docker Desktop
- Rancher Desktop
1. Microk8s
If there is one solution that you can get up and running quickly and very easily, it is Microk8s. Microk8s is an extremely Kubernetes distribution from Canonical. It’s designed to run on resource-constrained devices. While this intent is to make it a great fit for edge Kubernetes clusters, you can use it for a lightweight Kubernetes homelab that doesn’t require much at all. Also, Microk8s can be installed on a single node or you can use multiple nodes for the full Kubernetes cluster experience.
Installation Instructions:
You don’t even have to spin up a full Linux virtual machine for a single-node installation. You can run it inside of Windows Subsystem for Linux (WSL). This makes it even simpler since you don’t have the VM config to do, including cloud init, orsetting up an ssh server. You can launch your WSL terminal and install Microk8s using a simple snap command on your Linux machine.
Note the following command:
snap install microk8s --classic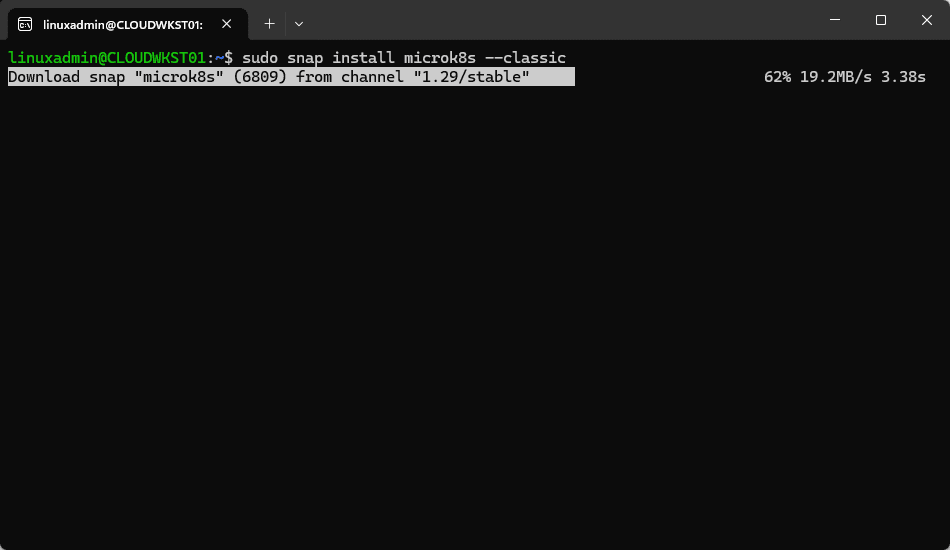
One of the great features of Microk8s is it allows you to easily install add-ons to add functionality to the Kubernetes cluster. To list the addons that are currently enabled and also list the addons that you can enable in the Microk8s cluster, use the following command:
sudo microk8s status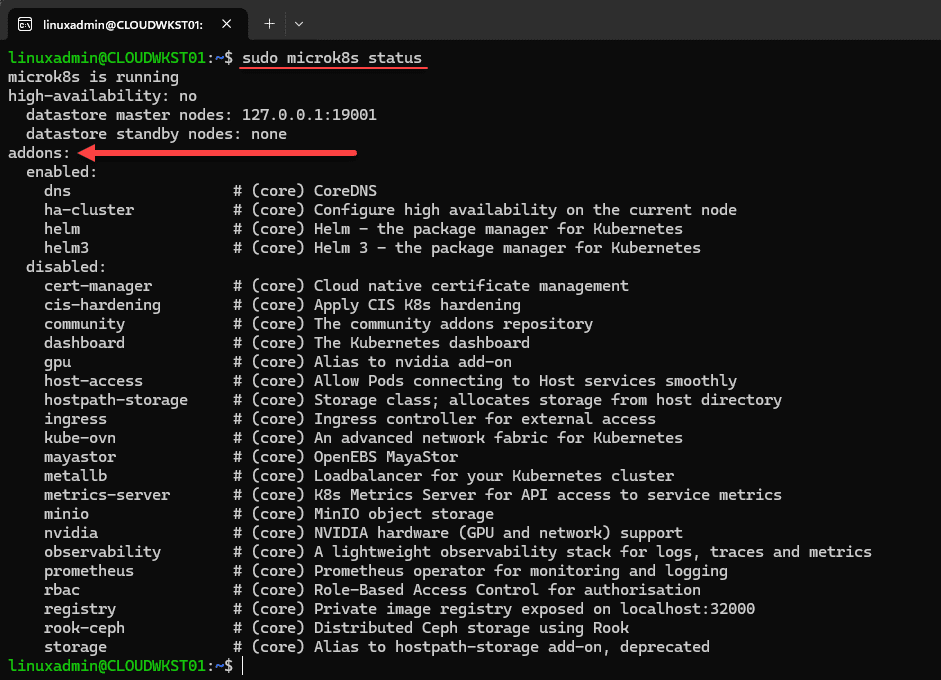
By default it will enable required add-ons like DNS, ha-cluster, helm, helm3. You can easily enable other Microk8s add-ons with the command:
sudo microk8s enable <add on>
Learn more about Microk8s here: https://microk8s.io/.
2. Minikube
Minikube is another popular choice for setting up a Kubernetes cluster as a single node. It also supports many different virtualization technologies to allow you to spin up your single Kubernetes node. These include KVM, Hyper-V, Docker, etc.
Let’s look at the steps to install Minikube in Ubuntu Linux. Make sure you have one of the virtualization technologies mentioned installed and ready to go before installing Minikube as this will be needed.
Installation Instructions:
The basic commands to install minikube are the following:
sudo apt install -y curl wget apt-transport-https && \
curl -LO https://storage.googleapis.com/minikube/releases/latest/minikube-linux-amd64 && \
sudo install minikube-linux-amd64 /usr/local/bin/minikube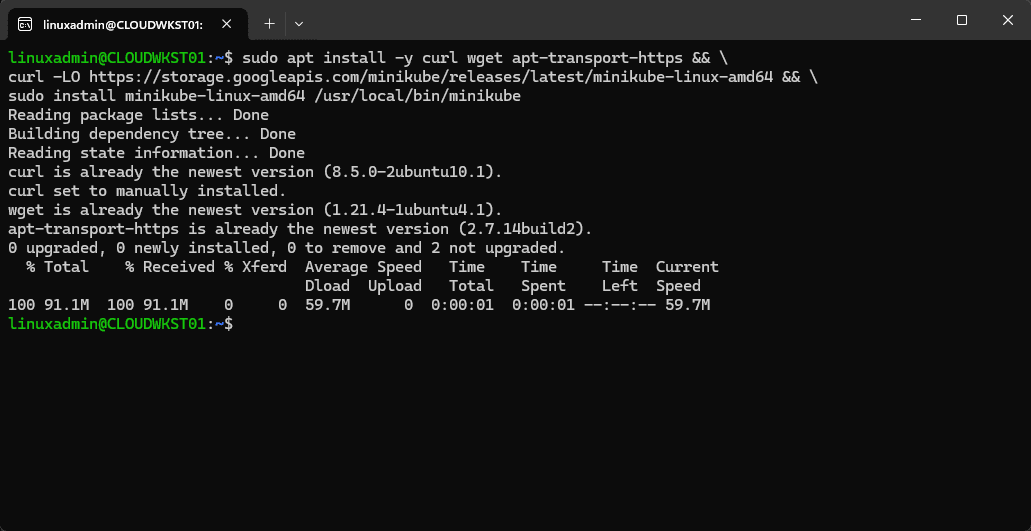
Checking the version using the command:
minikube version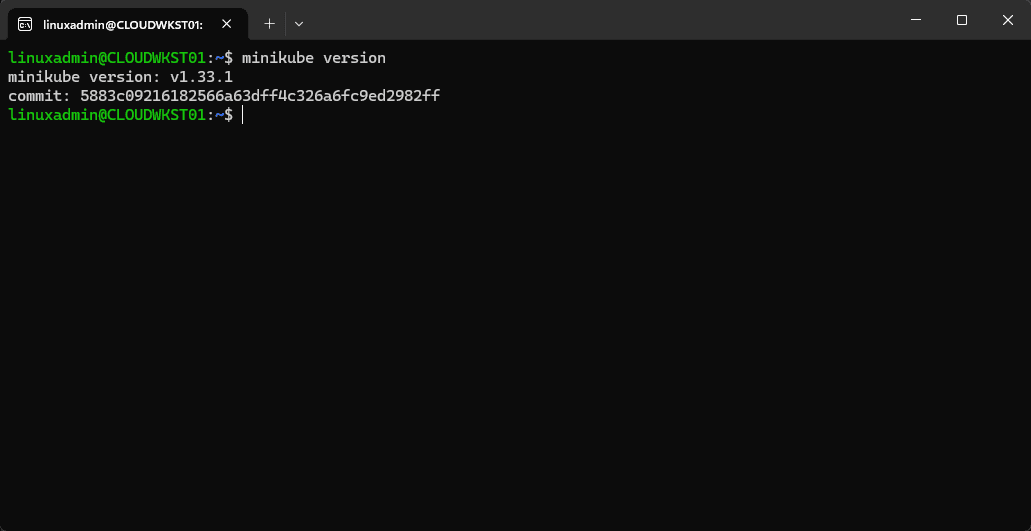
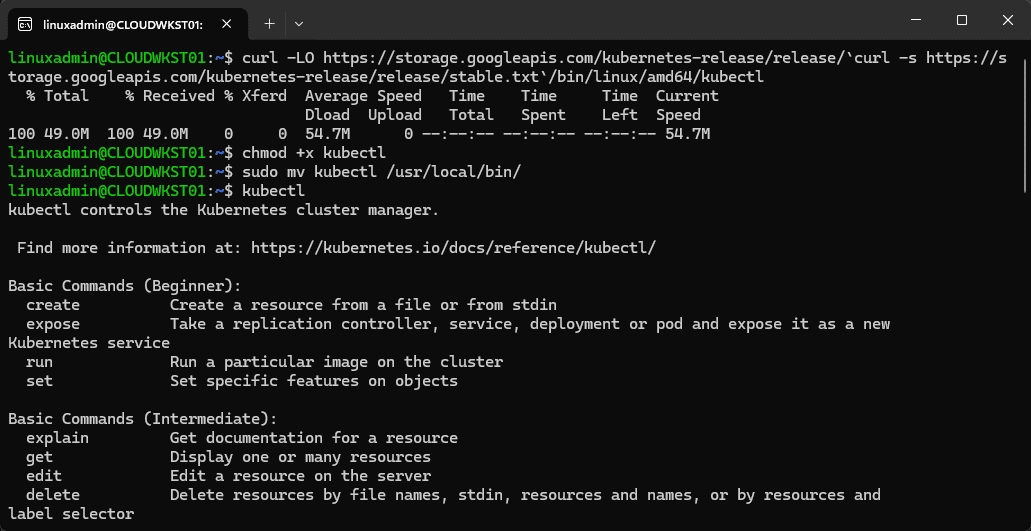
We also need to install kubectl as the command line that we will use to interact with our Kubernetes cluster. The commands to install kubectl are:
curl -LO https://storage.googleapis.com/kubernetes-release/release/`curl -s https://storage.googleapis.com/kubernetes-release/release/stable.txt`/bin/linux/amd64/kubectl

chmod +x kubectl
sudo mv kubectl /usr/local/bin/
Running through the steps to install kubectl.
Bringing up the minikube cluster using the Docker driver:
minikube start --driver=docker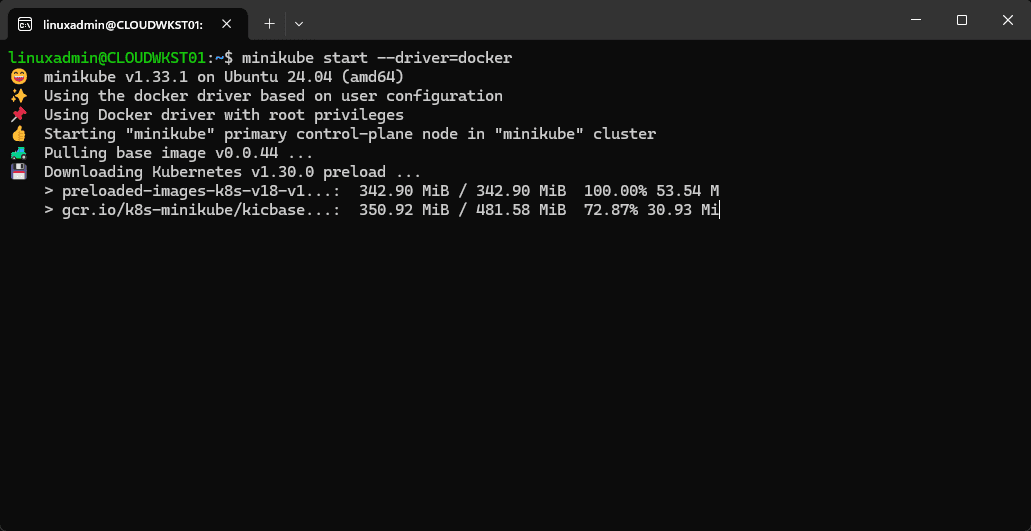
Learn more about minikube here: https://microk8s.io/.
3. k3s
k3s is another lightweight Kubernetes distribution by Rancher Labs. It is an optimized Kubernetes distribution that can run on ARM architecture, x86, and IoT devices to name a few. It’s designed to be easy to install and manage. Even though it is meant for production networks, it is also a great distribution for home labs since it can run a single or multiple nodes and is installed with a single script.
Installation Instructions
As far as installation, you can install k3s using the following bash script. The script will pull down the installation and install k3s along with setting the service to start on boot.
curl -sfL https://get.k3s.io | sh -You will need to copy the k3s.yaml file to a location you have access rights to for your user, such as your home directory.
sudo cp /etc/rancher/k3s/k3s.yaml ~Then change ownership of the file:
sudo chown -R linuxadmin k3s.yamlThen, you can set your environment variable to point to this file:
export KUBECONFIG=~/k3s.yamlNow, you can view your kubectl config:
kubectl config view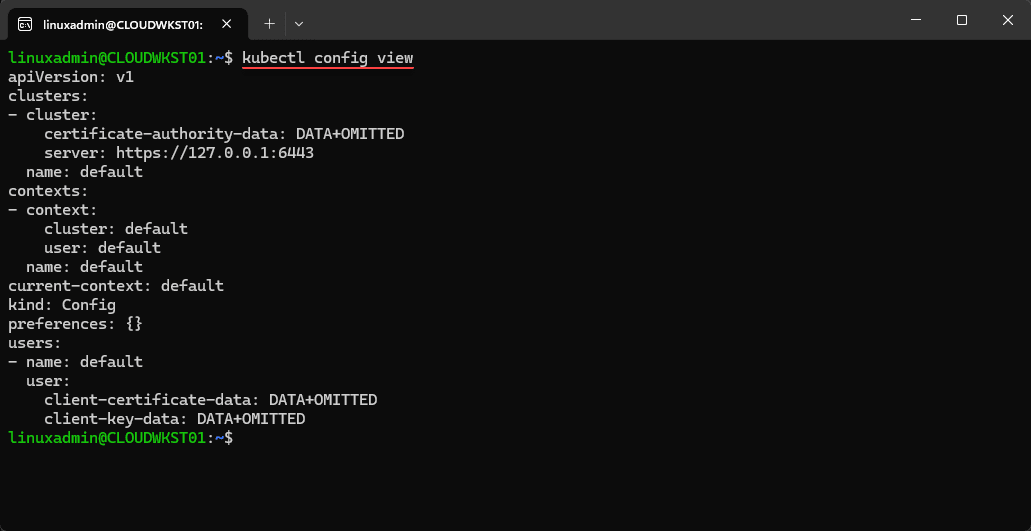
Since we have the kubectl config set correctly, we should be able to issue kubectl commands against the k3s node:

Learn more about k3s here: https://k3s.io/.
4. Docker Desktop Kubernetes
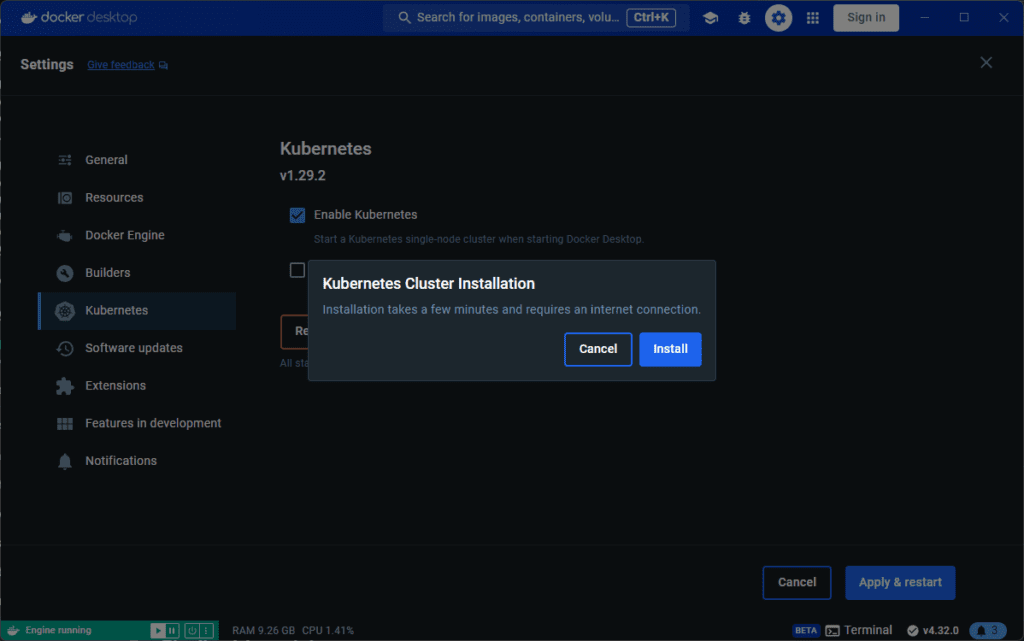
You may not have realized, but Docker Desktop includes setting up a Kubernetes environment right from within the interface under the Settings menu. If you navigate to your settings, you will see the Kubernetes option listed.
All you have to do for installation is check the Enable Kubernetes checkbox.
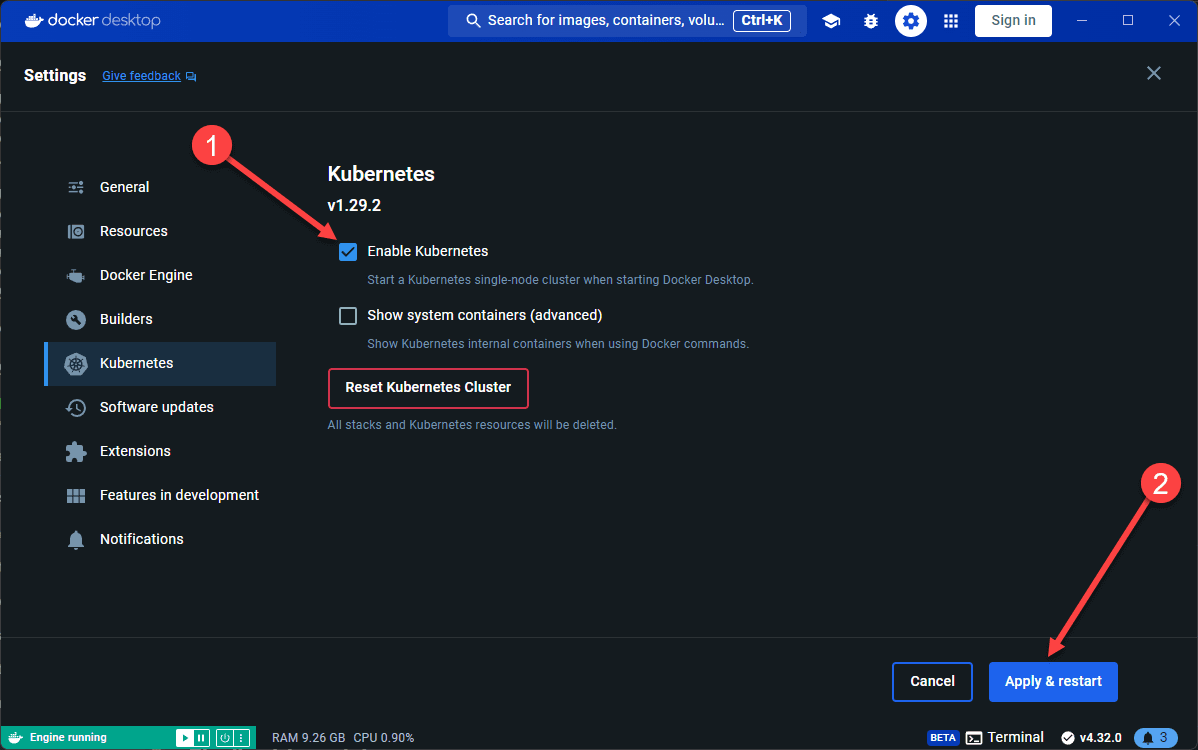
Click the Install button to pull the images and install the required components for Kubernetes.
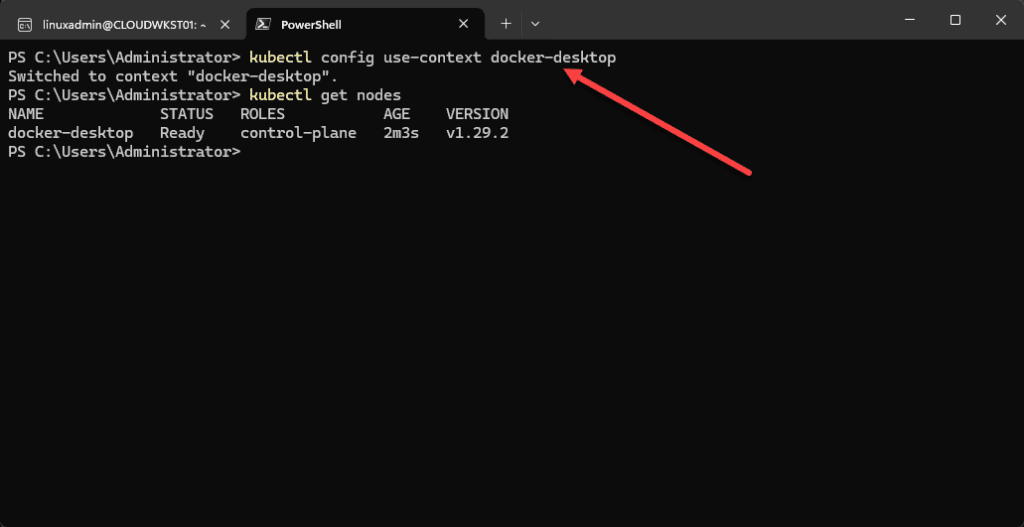
Now, we can change context to use the docker-desktop configuration for Kubernetes:
kubectl config use-context docker-desktopWe can see after changing the context, we can run the kubectl get nodes command and see we are indeed connected to docker-desktop configuration context.
Learn more about Docker Desktop here: https://www.docker.com/products/docker-desktop/.
5. Rancher Desktop
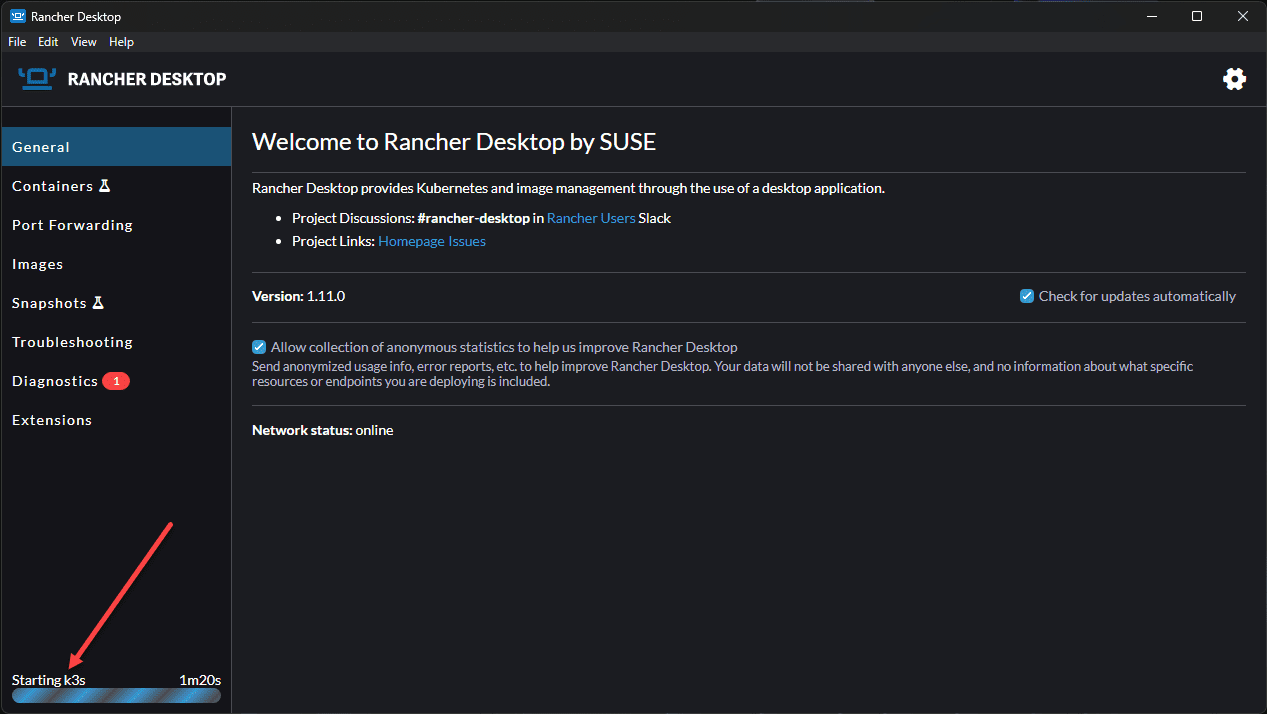
Rancher Desktop is an alternative solution to Docker Desktop for running containers on a desktop machine. But, one of the things that I like about Rancher Desktop is it is more Kubernetes-centric out of the box. In fact, the solution already runs Kubernetes under the hood with k3s.
Installation Instructions
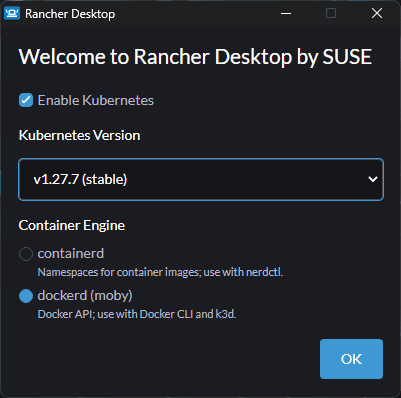
To enable Kubernetes in Rancher Desktop, you just install the solution. A great feature of Rancher Desktop is that it allows you to choose which version of Kubernetes you want to run. This is a great feature since it allows developers or home labbers to run a specific version of Kubernetes of their choose to align with production environments, etc.
Learn more about Rancher Desktop here: https://rancherdesktop.io/.
Kubernetes basics
Now that we have a few distributions to think about, let’s talk about a few of the basics before working with Kubernetes clusters.
Hardware and network
To run Kubernetes, you really don’t have to have special bare metal hardware. Kubernetes can run on Raspberry Pi devices, virtual machines, and very lightweight desktop computers that may be considered to be old.
However, it is still important to give some thought to the right hardware and make sure you have a network setup to support multiple nodes. You will want to have ip addresses defined and setup in your home network to handle the Kubernetes nodes as well as extra IPs for services if you use something like MetalLB load balancer. So your network requirements may vary depending on the number of services, nodes, etc.
With the desktop solutions like Docker Desktop and Rancher Desktop these NAT the traffic coming in so you don’t really need the additional IP addresses for your environment running in these.
Control plane vs worker nodes
Do understand the difference between the control plane nodes and worker nodes. What are these?
Control Plane:
- The control plane is installed on your master node
- Can be both a control plane node and a worker node
- It houses the API server, scheduler, and controller manager settings
Worker Nodes:
- This is where the kubelet and kube-proxy are installed
- You can use the kubeadm join command to join workers to the master node to form the cluster
Configuring Shared Storage
If you really want to have the benefits of production style Kubernetes in your Kubernetes homelab, you will definitely want to have some type of shared storage. This can be configured using something like NFS or you can use open-source solutions like Longhorn to have HCI-type storage for your Kubernetes cluster.
Once you have your shared storage configured, you then configure your storage class and persistent volume claims to utilize the shared storage efficiently.
kubectl
As we have seen in the screenshots above, kubectl is a valuable tool in working with Kubernetes clusters. It is the defacto tool that is used for interacting with a K8s cluster. Become familiar with kubectl and it will be your friend in working with Kubernetes.
Common commands include:
- kubectl get nodes
- kubectl get pods
- kubectl get all -A
Advanced Features
There are several advanced features and capabilities you can take advantage of with Kubernetes and running a Kubernetes home lab.
- High Availability: HA is configured by deploying multiple control plane nodes and configuring load balancers for traffic
- Microk8s does load balancing out of the box when you join more than one node together, which is great
- Using k3s with kubevib and k3sup allows creating HA clusters
- Terraform Provider: You can use Terraform to automate the deployment and management of your Kubernetes cluster.
Monitoring and Logging
You will want to setup monitoring and logging to be able to understand what is going on with your cluster at all times. Thankfully, there are many open source tools that allow you to do this:
- Monitoring: You can use Prometheus and Grafana to visualize resource usage and performance metrics.
- Logging: You can use solutions like Elasticsearch, Fluentd, and Kibana (EFK) stack. These allow you to collect and analyze logs from your Kubernetes cluster.
Wrapping up
Setting up a Kubernetes home lab cluster is a great way to understand and become familiar with Kubernetes. You can take those skills learned in the home lab and apply them to production. More and more companies are migrating to containerized applications and refactoring existing legacy applications so these can run inside containers and in the cloud. Start with the basics of learning containers and then move into running easy Kubernetes distributions like the ones we have listed: microk8s, minikube, k3s, docker desktop, and rancher desktop. Let me know in the comments if you have found other Kubernetes home lab distributions helpful or just tell me what you are using.