
Let’s look at Proxmox network setup for beginners and see how you can get jump started with using it for virtualization.
Overview of Proxmox network configuration
Out of the box, Proxmox has a default networking stack that is set up for you after you install it on your Proxmox VE host. It uses the Linux network stack for networking. This includes the linux bridge configuration. The default linux bridge will be configured out of the box using one of your physical interfaces available on your Proxmox host.
You can see this default configuration in the web interface when you log into your Proxmox host. You can also take a look at the default configuration as well by editing the following file:
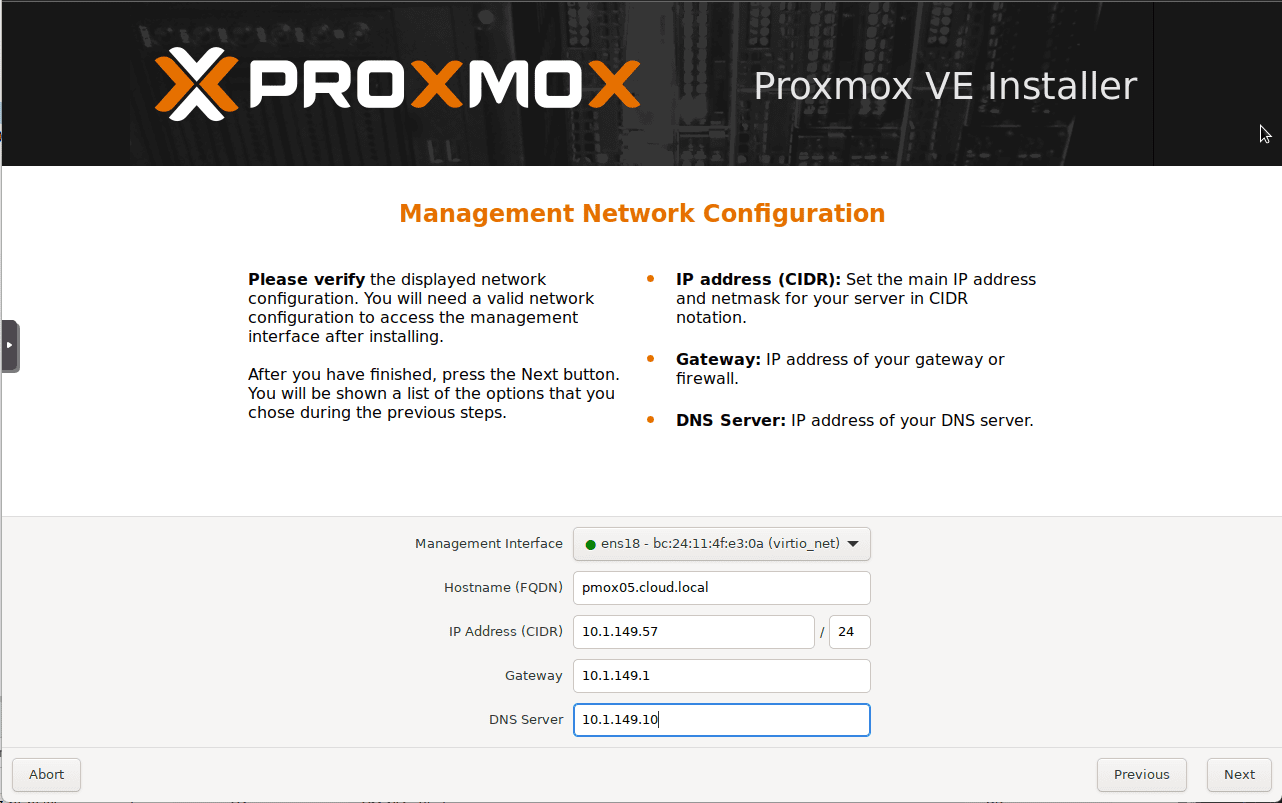
/etc/network/interfacesThe default configuration for an IP address assigned to your Proxmox VE host is configured during the installation of Proxmox when you install it from the installation media.
During the boot of the installation media, you will see the Proxmox host reach out for an IP address that it will attempt to autoconfigure during the installation, before you have the chance to set a private IP statically.
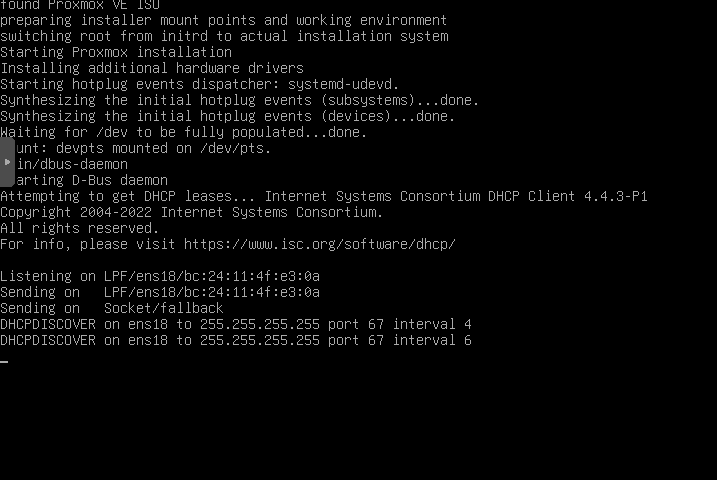
This IP address that you set during the installation of Proxmox is assigned to the default Linux bridge.
What is the Linux Bridge?
Let’s get an understanding of the Linux Bridge. The Linux bridge is part of the Linux kernel. It allows you as the admin to create a network bridge between your Proxmox virtual environment and the physical network.
Bridges are like physical network switches with mac address tables, etc that are brought up in software. All virtual machines can share a single bridge, or you can create multiple bridges to separate network domains.
The Proxmox Linux Bridge
You can see this default bridge when you look at the Proxmox host administration interface then System > Network. You will see the default bridge listed as vmbr0.
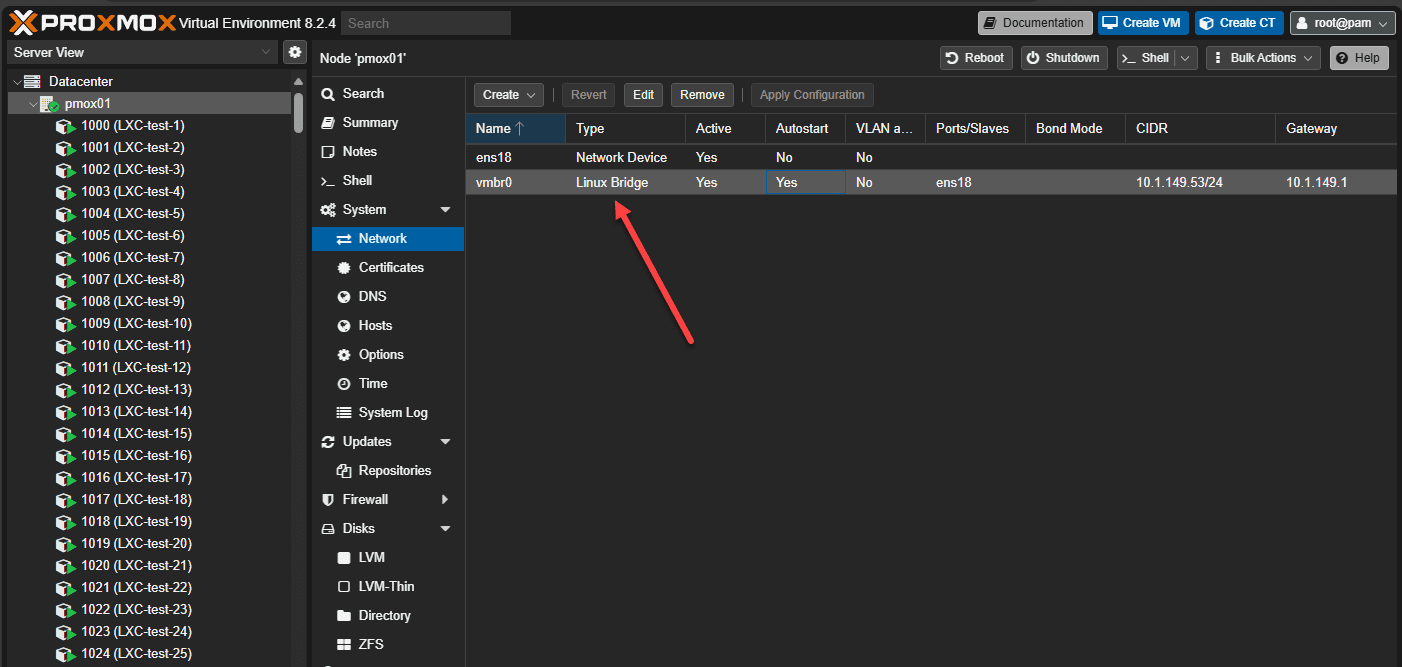
You can edit the default Linux Bridge. When you do, you will see the name, the currently configured private network IP address and mask and the Gateway. We also see it is set to autostart, and we have the option for VLAN aware, which we will talk about more below. For most environments this will never be a public IP since you wouldn’t want to expose your PVE server host to the Internet directly.
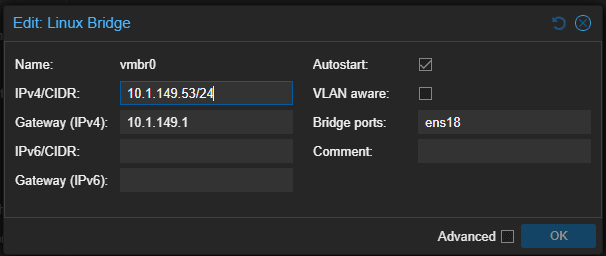
You can change the IP address that is configured in your Proxmox host from the web UI and then restart networking.
Changing your IP via the command line
You can edit the /etc/network/interfaces file Below is the /etc/network/interfaces file that I am editing on a mini PC that has Proxmox VE 8.2.4 installed. The IP address is defined for the iface vmbr0 inet static which tells us it is a static address. Then we see the address configured in the configuration block underneath. We also see the loopback interface in the form of iface lo inet loopback.
Below, you also see the wireless network adapter found in the mini PC.
auto lo
iface lo inet loopback

iface enp1s0 inet manual

auto vmbr0
iface vmbr0 inet static
        address 10.1.149.52/24
        gateway 10.1.149.1
        bridge-ports enp1s0
        bridge-stp off
        bridge-fd 0

iface wlp2s0 inet manual


source /etc/network/interfaces.d/*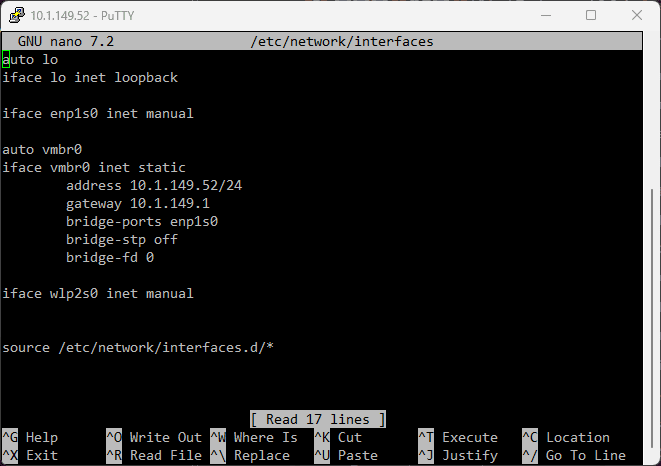
To do that from the command line you can use the following command with out a reboot:
systemctl restart networkingMaking your Linux Bridge VLAN aware
Most likely once you start playing around with and connecting up Proxmox VE with just a basic VLAN1 untagged configuration, you will want to start working with VLANs. VLANs are a great way to segment and secure your network as part of your Proxmox network setup.
Likely even in your home lab environment, you have a few VLANs setup. I like to segment things like Servers from clients, IoT devices, and wireless just to name a few. You may want to a VM or virtual machines on these different VLANs or have those connected to those specific networks via L2 instead of L3 connectivity (so on same subnet and not routed).
Making your Linux Bridge VLAN aware is the simple tick box we saw in the Linux Bridge properties earlier.
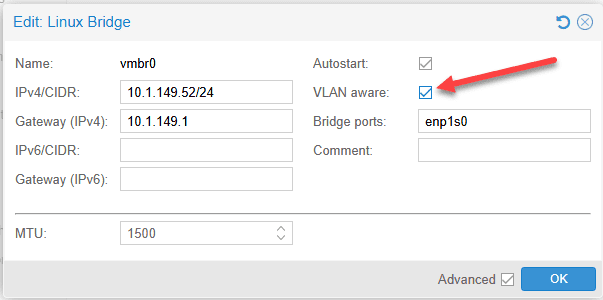
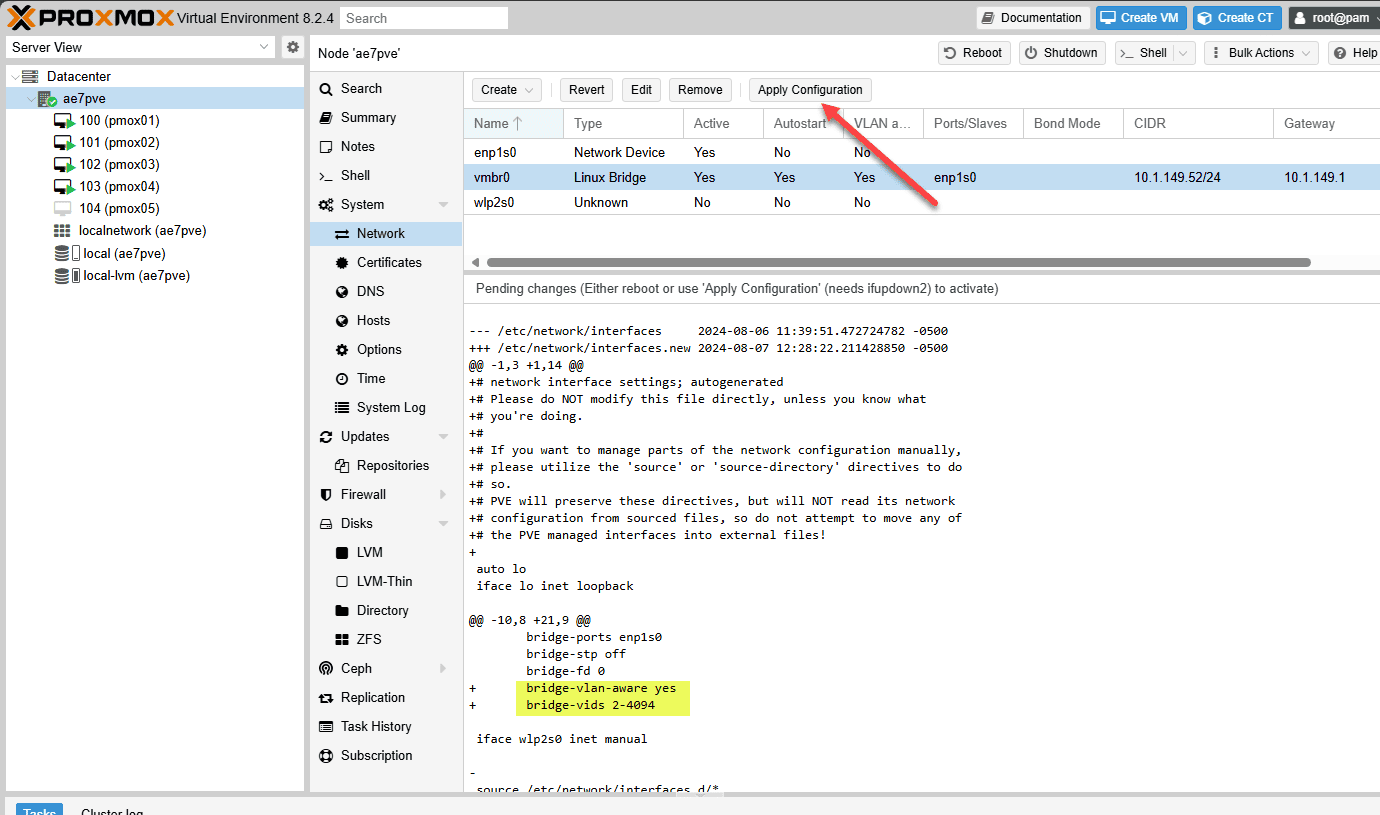
Now, we just need to apply the VLAN aware configuration. We can see in the new version of the config config file that we have the addition of the two lines:
bridge-vlan-aware yes
bridge-vids 2-4094
So, essentially the bridge can now trunk vlans across.
Linux Bridge VLAN configuration
If you want to VLAN tag your management interface on the Linux bridge there is some configuration we need to do and change to be able to configure this.
You will need to remove the IP address configuration from the iface vmbr0 configuration or iface eno1 inet manual configuration. We leave the configuration about the VLAN intact in the file. Keep in mind you don’t want to have multiple IP addresses on your host on the same subnet.
Now, we create something that looks a lot like a subinterface from the Cisco world or if you have worked with firewall configurations. You will create something that looks like this:
vmbr0.<vlan tag>This is a new interface where we will configure the IP address information for the Linux bridge network device.
Now we have the IP address configured on the new “subinterface” for VLAN 333 configured off the default Linux bridge device.
auto vmbr0

iface vmbr0 inet manual

	bridge-ports ens192

	bridge-stp off

	bridge-fd 0

	bridge-vlan-aware yes

	bridge-vids 2-4094

auto vmbr0.333

iface vmbr0.333 inet static

    address 10.3.33.28/24

    gateway 10.3.33.1
Physical network switch
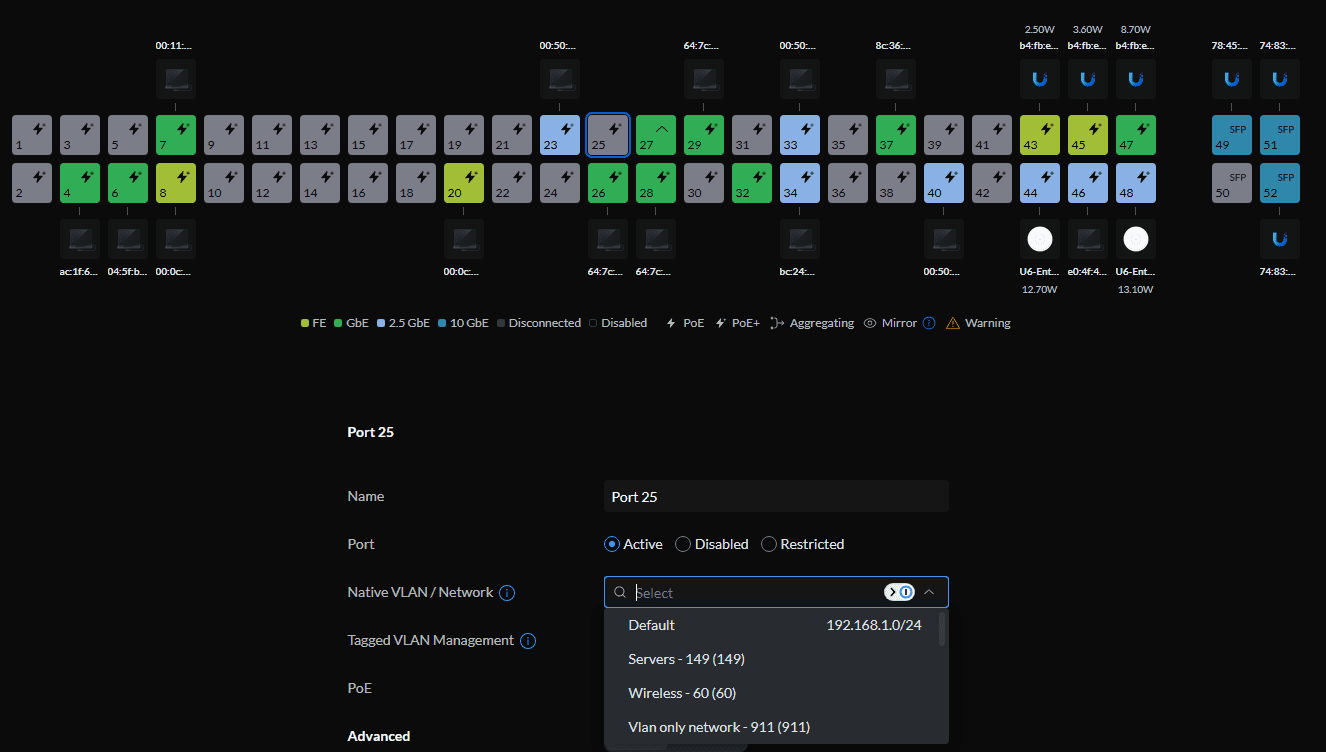
Keep in mind that after configuring your new Linux Bridge virtual interface, when you enable VLANs in Proxmox on the host and tag traffic, your upstream physical switch needs to be tagged with those VLANs to pass the traffic. Make sure you have trunked your Proxmox VE server uplink ports so the VLAN traffic will be passed as expected.
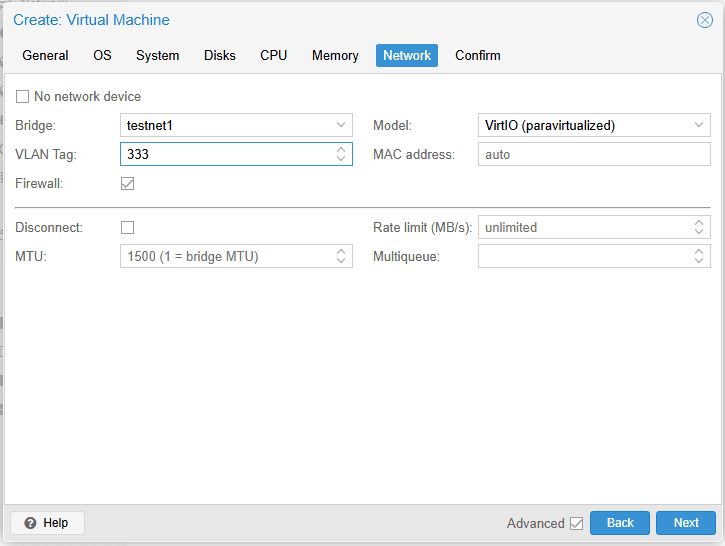
VM with VLAN tag
Virtual machines can be tagged with a VLAN tag in the network configuration so that the VM passes VLAN tags. Keep in mind your Linux Bridge needs to be made VLAN aware and that your physical switch once again, needs to have the ports configured as trunk ports on the uplink from the Proxmox VE host and not an access port.
You can see below that on the Network tab of the new virtual machine network interface dialog box, we have the field for VLAN Tag.
Proxmox Software Defined Networking
Proxmox 8.1 introduced Proxmox Software Defined Networking (SDN). The software defined networking introduced in Proxmox allows you to do some other really cool networking configurations, all the way from simple vnets to advanced VXLAN configurations.
We can easily setup a simple SDN network that will NAT all traffic coming from the network as the source IP of the Proxmox host. This is a great way to configure new networks, without having to worry about routing them or creating routes upstream on your router to handle routing out to the Internet.
Install DNSMasq
Before configuring SDN, we need to install dnsmasq:
apt update
apt install dnsmasq
# disable default instance
systemctl disable --now dnsmasq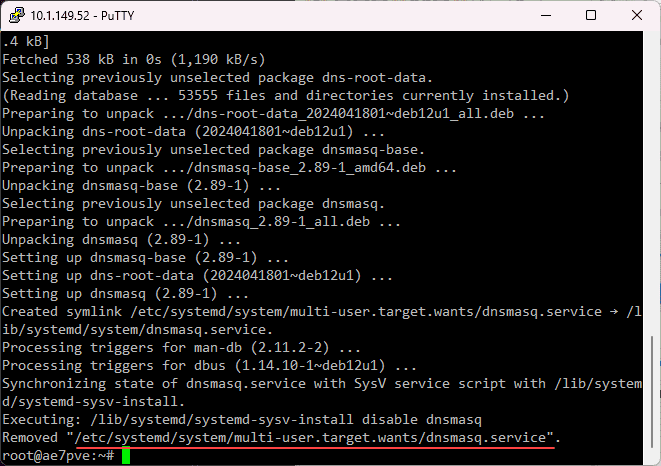
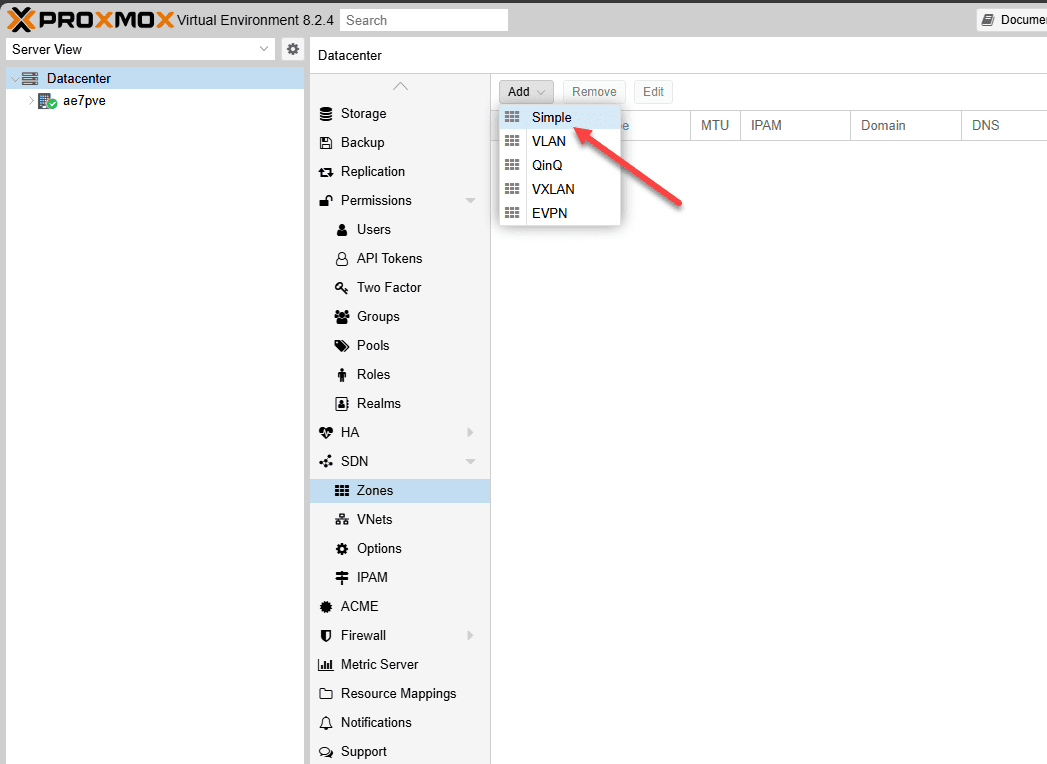
Add an SDN zone
Now we can begin doing the work we need to do inside the Proxmox interface. Click Datacenter > SDN > Zones, then click add a Simple zone.
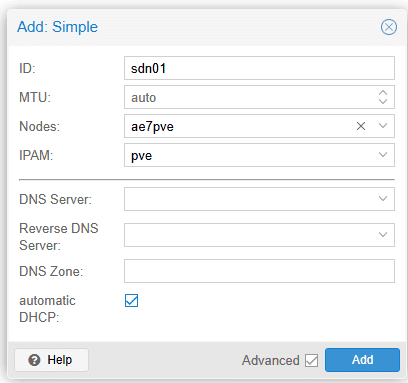
Below is how I have my zone setup. Choose your node and then select automatic DHCP if you want to use DHCP for the zone.
Add a VNet
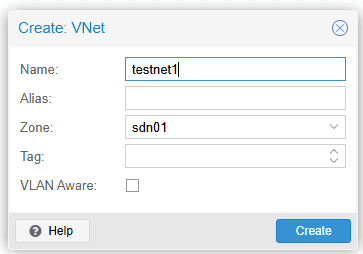
Next we will add a VNET. Click the VNets menu and then click Create.
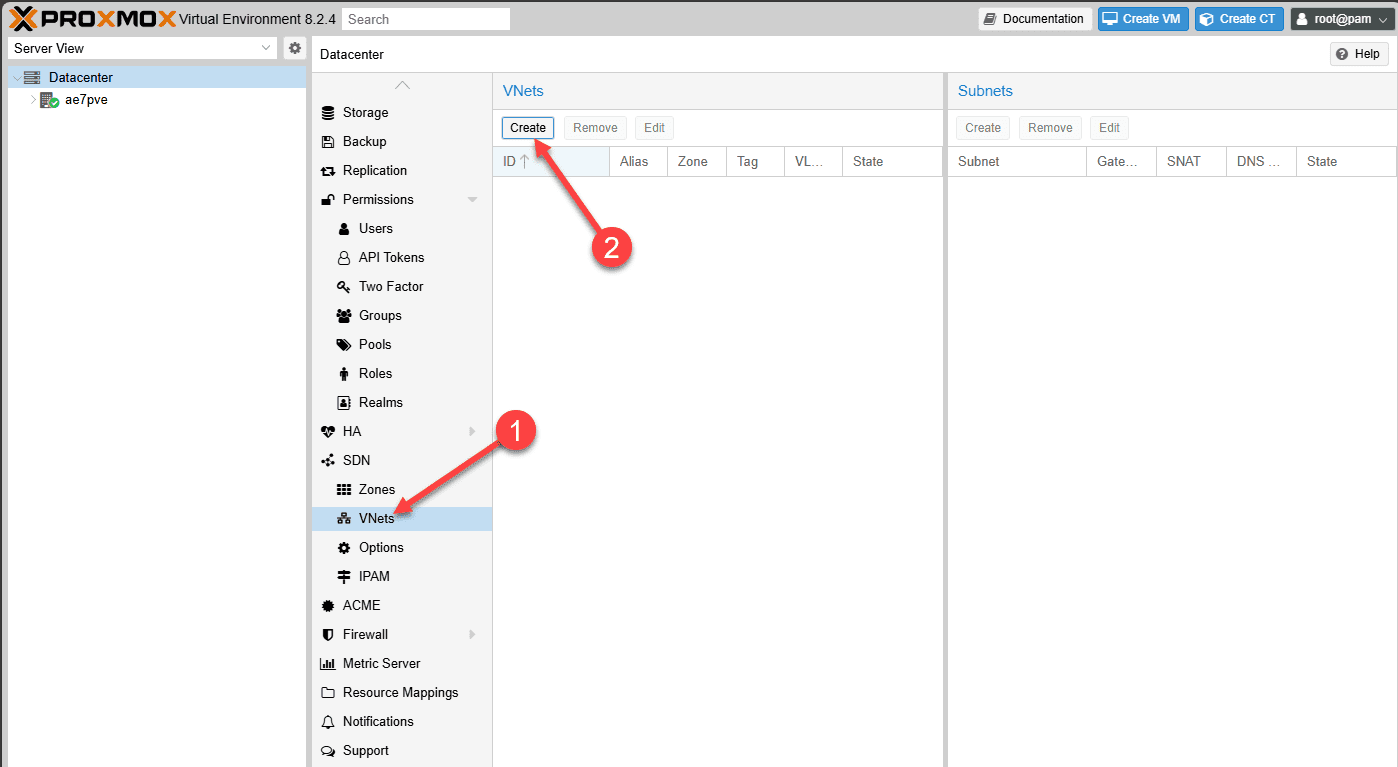
Name the VNet and attach the zone we created in the step before. Click Create.
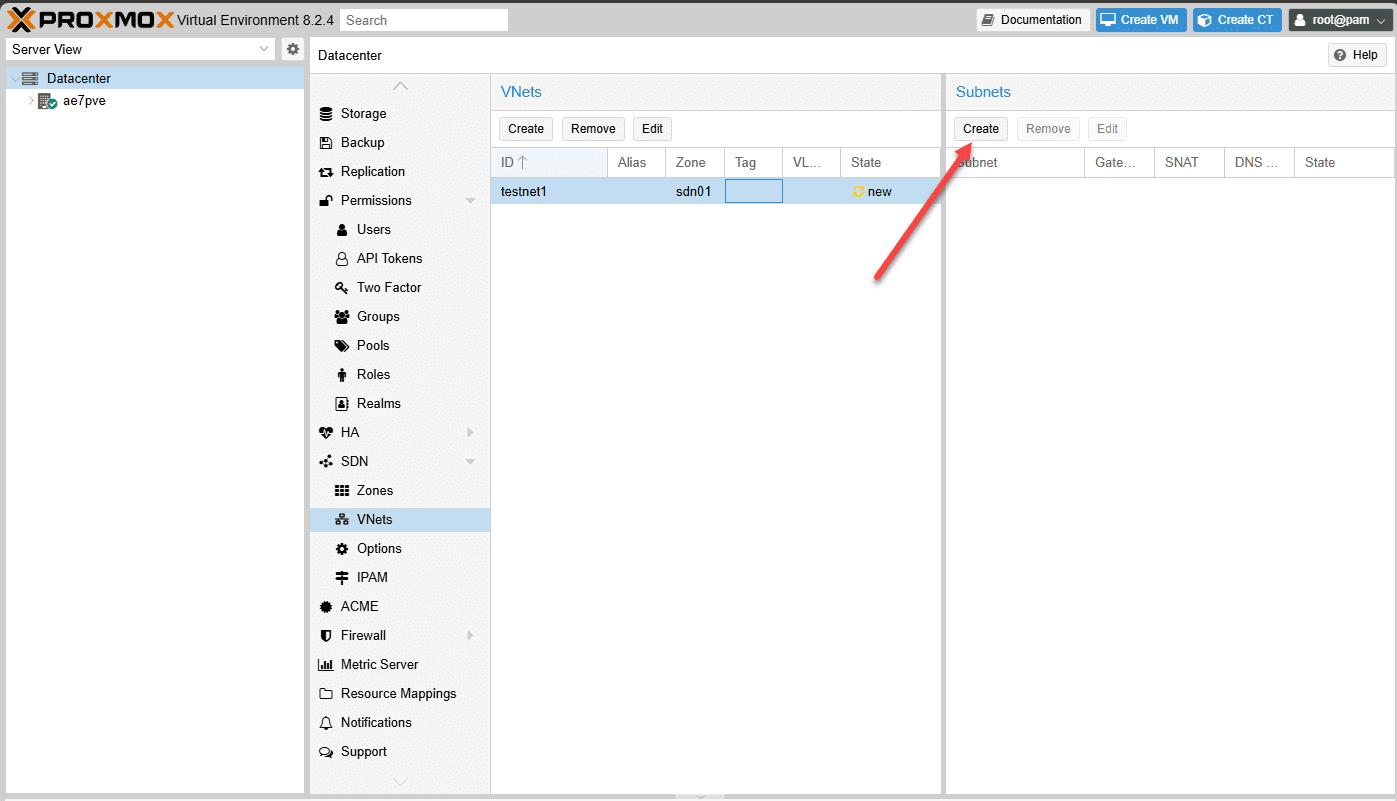
Add a Subnet and DHCP scope
Now, add a subnet. Click the VNet to highlight it and then you should have the Create button activate under Subnets.
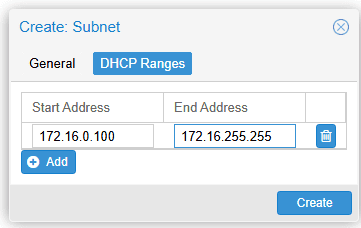
Enter your subnet and gateway. Also, here we are adding SNAT. It means all the VMs or containers running on this network will have their network settings automatically configured and will appear as the IP address of the Proxmox host on the network.

Click Create to create the new Subnet and DHCP scope for the subnet.
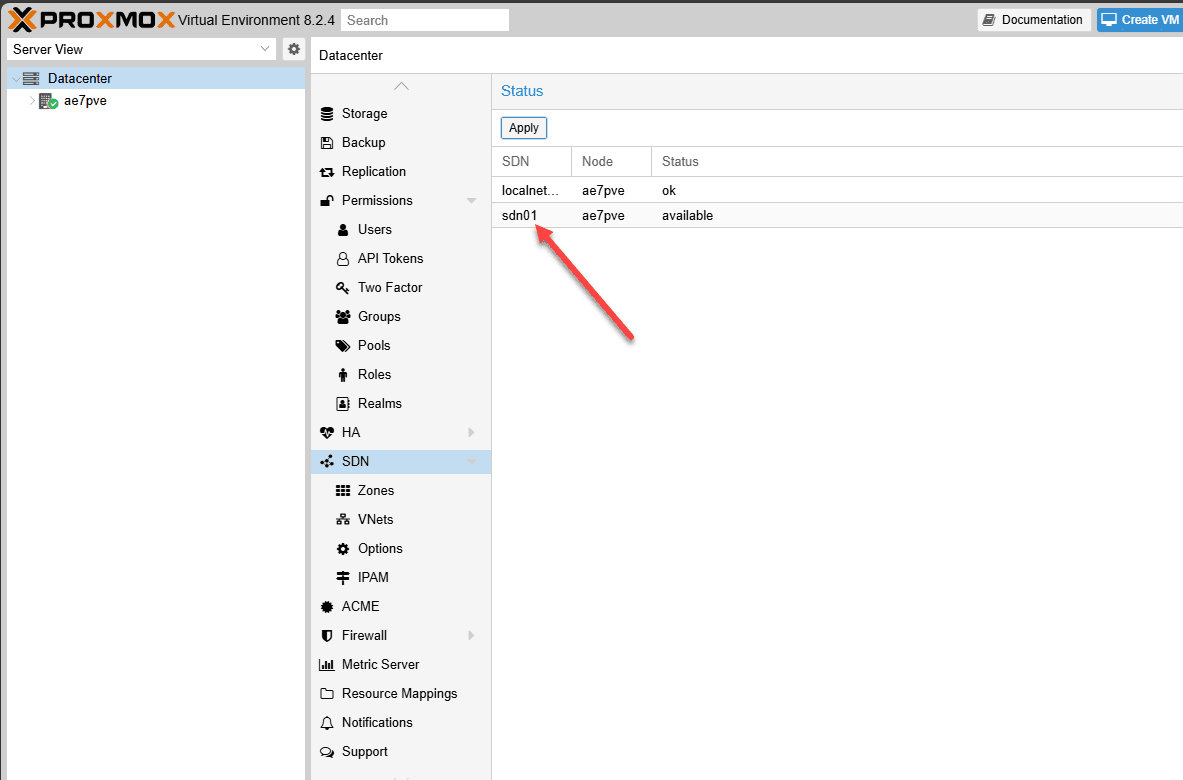
Apply the SDN changes
Now, go back to SDN and click Apply under the status field in that window. This will apply the changes we have made.
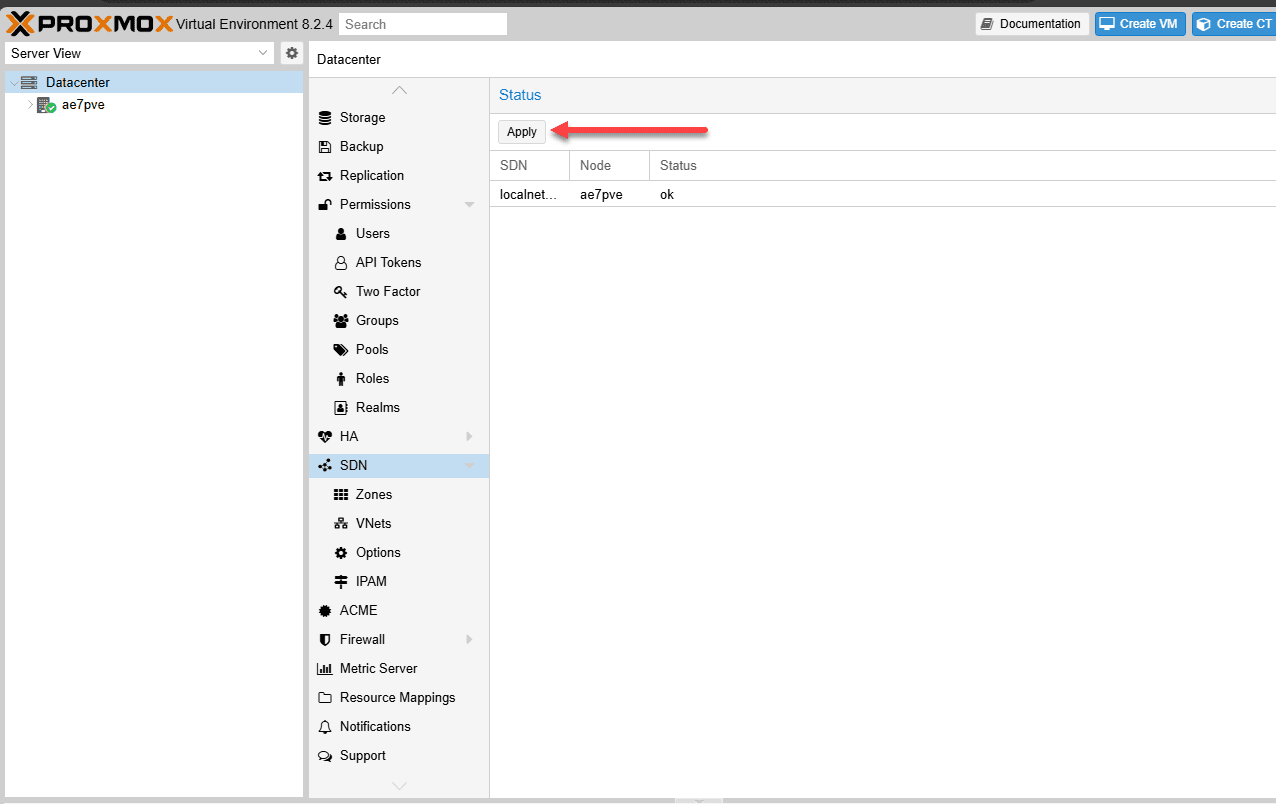
After applying the configuration, the new SDN network will appear after the networking services restart.
Wrapping up
As you can tell, Proxmox has a lot of great built-in network features that build on top of the Linux networking stack found in the modern Linux kernel. We can use the default linux bridge for the initial Proxmox network setup and getting things running with a basic networking configuration in Proxmox that is akin to the vSwitch0 of VMware ESXi to start getting things connected to the network and VMs connected and working. The new Proxmox SDN feature is also a great tool to use when you need to quickly spin up networks and have more advanced network configurations.