
If you are doing much DevOps and working with terraform code, Ansible, or other IaC, having a secure place to store secrets so your code doesn’t have those secrets hard coded is a great way to make sure secrets and passwords are not stored in plain text. If you are looking to spin up Hashicorp Vault in an easy way, spinning it up in Docker is a great way to get up and running quickly. Let’s look at the steps to spin up Hashicorp Vault in Docker.
What is Hashicorp Vault?
Hashicorp Vault is a solution that allows easy secrets management and provides a way for dynamic secrets and even providing Kubernetes secrets. You can also use it for database credential rotation, automated PKI infrastructure, identity-based access, tokenization, key management, and many other use cases just to name a few.
It allows you to secure applications and systems with machine identity and automated credential issuing and rotating. You can also do this with user identity. You can use it to provide secure credentials and resources for users.
You can learn more about Vault here: Vault by HashiCorp (vaultproject.io).
Install Hashicorp Vault in Docker using Docker Compose
Let’s take a look at the components we will need to spin up for installing Hashicorp Vault in a Docker container. Hashicorp provides the Docker image. We just need to configure the container to use it and the configuration for connecting users and machines to it.
We will need the following:
- Docker and Docker Compose installed
- Create the docker-compose.yml file
- Create the vault-config.json file
- Issue a
docker-compose up -dcommand to bring up the Vault container - Unseal the Vault instance
- Login with the root token
1. Docker and Docker Compose installed
Refer to your specific Linux distribution for installing Docker and Docker Compose. However, you can consult the Docker documentation here for Ubuntu and Debian: Install Docker Engine on Ubuntu | Docker Docs.
2. Create a Docker-Compose.yml file
You will need to create a Docker-compose.yml file on your Docker container host. I like to create a parent folder, like vault and then create the docker-compose.yml file under this folder so the other folders that will get created will reside underneath the vault folder.
The Docker-compose.yml file contents will look like the following. Note the following:
- We are using the image hashicorp/vault:latest as the image
- We are naming the container vault
- The ports we are configuring is exposing port 8200 on the outside to port 8200 on the inside
- We are creating volumes using a source folder of config and data and passing these into the container as volume mounts.
- cap_add – is a security option to not swap data
- Also, we are issuing a command at the bottom of the docker-compose.yml file that will pick up the configuration found in our vault-config.json file.
version: '3.8'

services:
  vault:
    image: hashicorp/vault:latest
    container_name: vault
    ports:
      - "8200:8200"
    volumes:
      - ./config:/vault/config
      - ./data:/vault/file
    cap_add:
      - IPC_LOCK
    command: "vault server -config=/vault/config/vault-config.json"
3. Create the vault-config.json file
As we see it referenced in the docker-compose.yml file, we need to create the vault-config.json file in a subfolder under your vault folder called config. Here is the contents of the vault-config.json file. Note the following:
- We are setting the path to a file path
- We are setting up the listener
- We are disabling TLS as we will use a reverse proxy like nginx proxy manager or traefik to secure the connection to Vault with SSL
- We are enabling the UI
{
  "storage": {
    "file": {
      "path": "/vault/file"
    }
  },
  "listener": {
    "tcp": {
      "address": "0.0.0.0:8200",
      "tls_disable": true
    }
  },
  "ui": true
}
4. Issue a docker-compose up -d command to bring up the Vault container
Now that we have the configuration in place, we can issue the docker-compose up -d command:
docker-compose up -d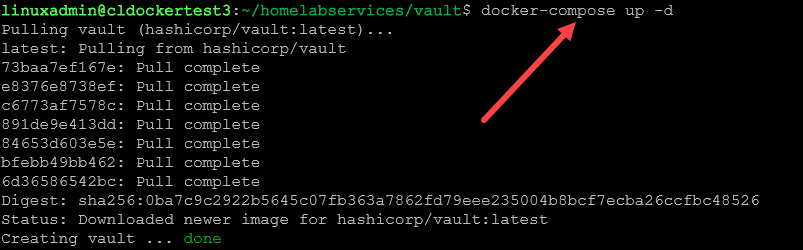
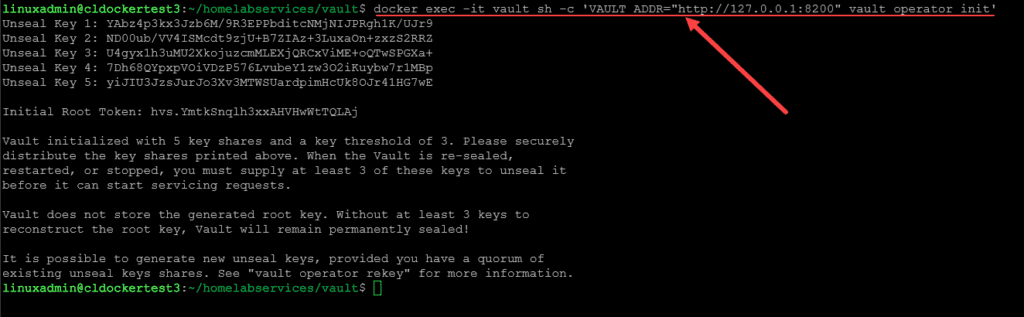
5. Unseal the Vault instance
Now that the container is up and running, we can unseal our Vault instance. To do that, run the following command:
docker exec -it vault sh -c 'VAULT_ADDR="http://127.0.0.1:8200" vault operator init'As you can see below, you will get the 4 unseal tokens which are needed for the unseal operation and the initial root token.
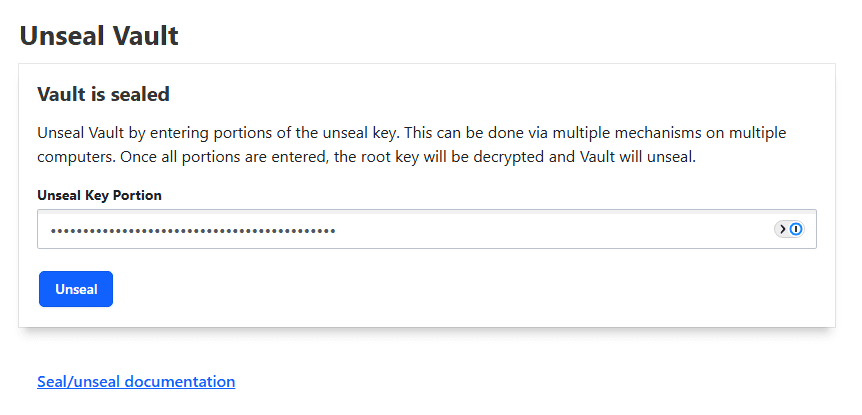
Now that we have the unseal keys and root token, take note of these and record these somewhere safe. We can now browse to the web address on port 8200 of the Vault instance and we will see the following displayed in the web interface. It is asking us to unseal the Vault instance.
You will need to use 3 out of the 4 unseal tokens to unseal it. Paste the first one click Unseal, then paste the 2nd and so on.
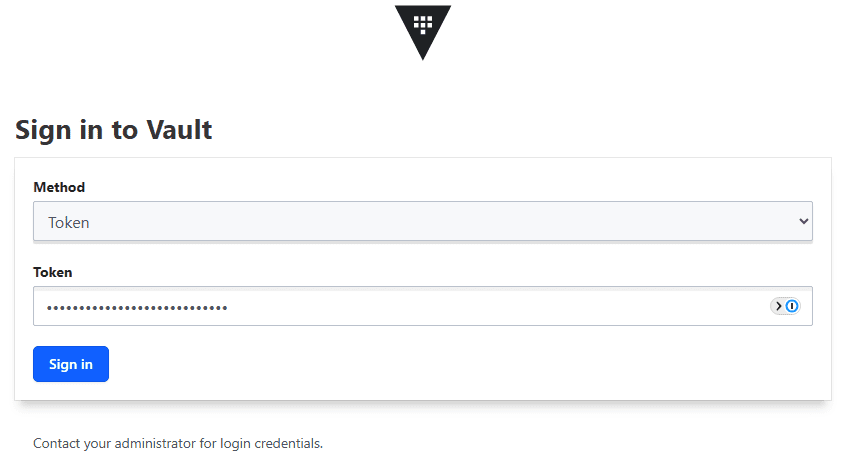
6. Login with the root token
After the unseal operation is successful, you will be taken to this screen which is simply asking for the root token. Now we can can login with the root token that was also provided in the output of the vault operator init command.
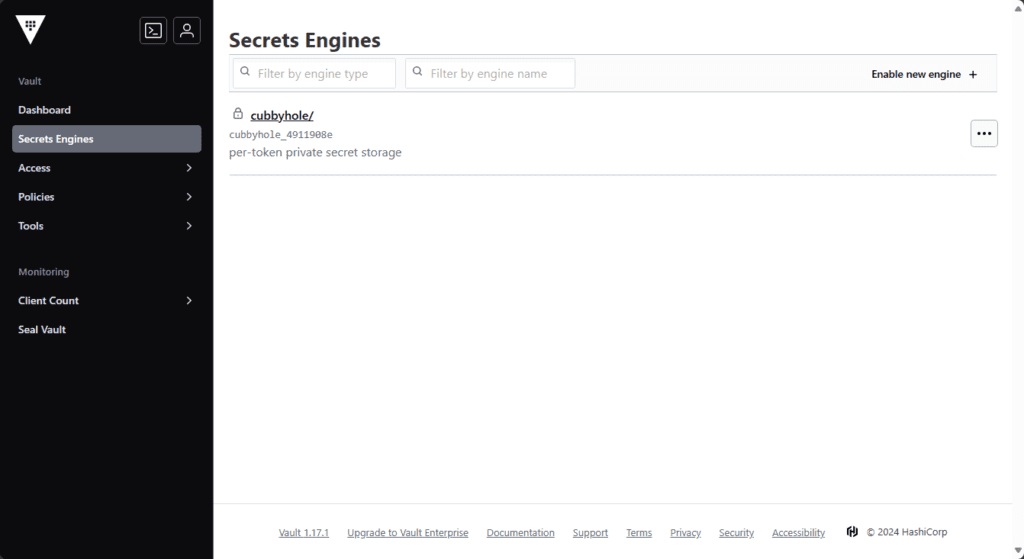
Now, you should be logged in and we can start working with secrets.
Troubleshooting
You may run into some issues when provisioning Vault. Make sure of the following if you experience errors:
- If Vault container fails to start, look at the Docker logs with the
docker logs <container name>command - If you receive the error “
Get https://127.0.0.1:8200/v1/sys/seal-status": HTTP: server gave HTTP response to HTTPS client, then you need to make sure you specified in the command to unseal, the following VAULT_ADDR value:docker exec -it vault sh -c 'VAULT_ADDR="http://127.0.0.1:8200" vault operator init' - Your unseal tokens or root token doesn’t work – Check your command output history and copy/paste the tokens again to verify they are accurate. You can also take down the container again
docker compose downand then delete the contents of your data folder withrm -rf /datacommand
Wrapping up
The steps to install Hashicorp Vault in Docker are straightforward. You don’t have to run Kubernetes to install Vault. Instead, you can use a simple Docker container. However, keep in mind, this is not best practice for production environments according to Hashicorp. You will want to make sure you have redundant storage and compute backing your Vault pod/container. Let me know in the comments if you have played around with Hashicorp Vault.