
Windows Subsystem for Linux is a great tool that provides the ability to have the Linux command line readily accessible from a Windows machine and even run Linux GUI apps. If you run a Windows daily driver, this is definitely a tool you need to know. If you are already using WSL I want to step you through the top tweaks to implement with WSL to get the most out of your WSL installation.
What is Windows Subsystem for Linux?
First, before we dive into the tweaks, what is Windows Subsystem for Linux (WSL) anyway? Windows Subsystem for Linux or WSL as it is also referred to as is a light virtualization environment that runs Linux binaries natively in Windows 10 and 11 platforms. This way, you don’t have to have a dual-boot setup configured or run a full Linux virtual machine to have access to Linux, which is super cool.
Another great thing as of recently, Microsoft has integrated WSL directly into the Microsoft Store so you can easily get WSL installed in Windows without having to jump through hoops and install one-off packages as you had to do a few years back.
Also, you can download different Linux distributions directly from the Microsoft Store, such as Ubuntu Server, etc.
Learn more at Microsoft Learn here: What is Windows Subsystem for Linux | Microsoft Learn.
Windows Subsystem for Linux tweaks
Let’s look at the following tweaks:
- Suppress the sudo password prompt
- Enable systemd in WSL
- Install Ansible
- Persistent Aliases
- Install PowerShell
- Add VMware PowerCLI module
- Copying files between WSL and Windows
- Installing Kubernetes (Minikube and Microk8s)
1. Suppress the sudo password prompt
Let’s look at suppressing the sudo password prompt. This makes it easier to work with a sudo user so you aren’t nagged with entering your password with everything you try to do. To modify the password for a sudo user, type the command:
sudo visudo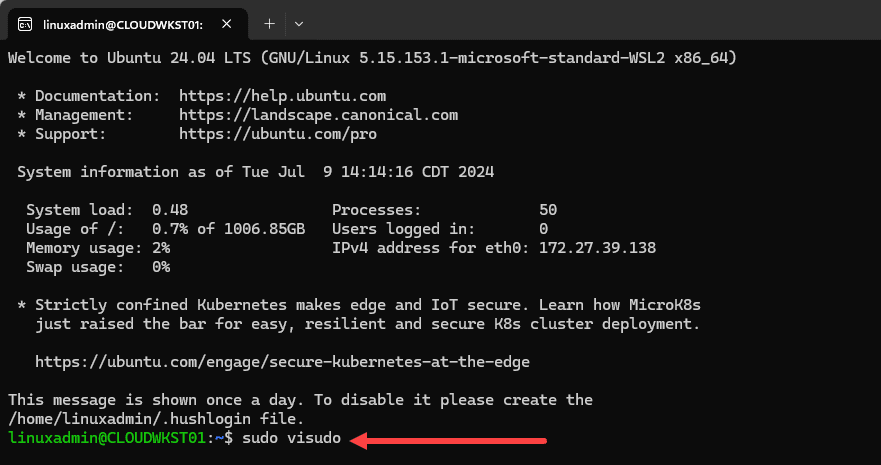
This will launch the file that we need to modify. At the bottom of your file, enter the following. Note, I will be showing the command with linuxadmin but replace this with the user you want to disable the password requirement for:
linuxadmin ALL=(ALL) NOPASSWD: ALL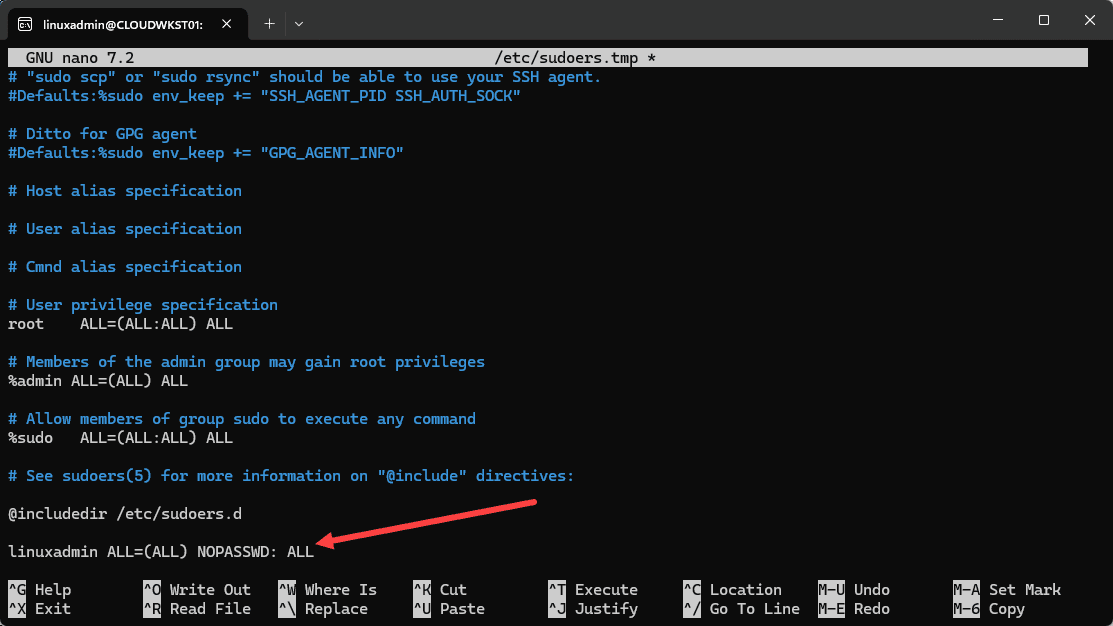
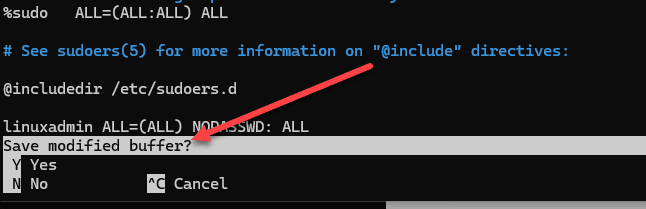
Now, just save and close the file to make the changes effective.
2. Enable systemd in WSL
Systemd is needed for some applications and processes, such as running Microk8s in WSL. It used to be fairly difficult and cumbersome to get systemd working in WSL. However, it is now much easier than before.
To enable systemd in WSL, we need to edit the following file:
sudo nano /etc/wsl.conf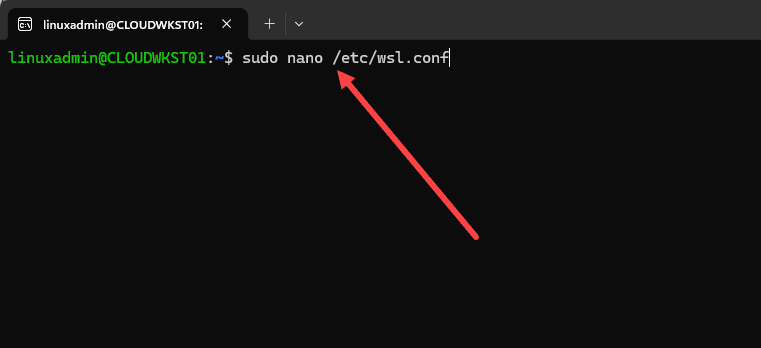
There will likely be nothing in this file unless you have modified it already. However, we need to add the following config to the file:
 [boot]
systemd=true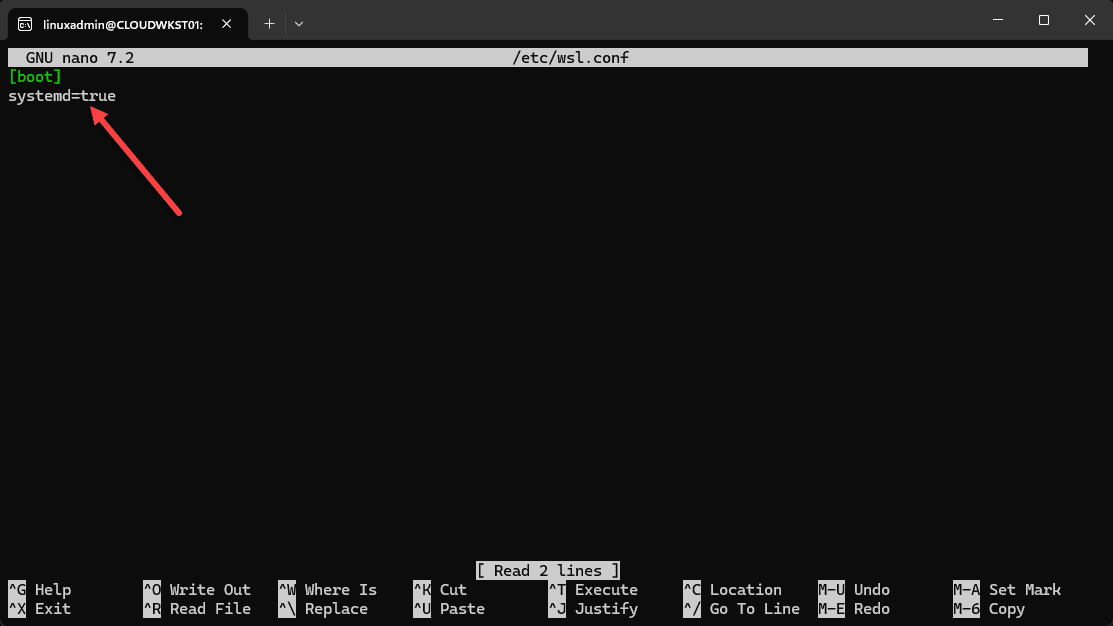
Now we need to shutdown WSL so that it can be booted back up with systemd enabled. First we need to find the WSL instance to shutdown. To list the instances, run the following command:
wsl --list --running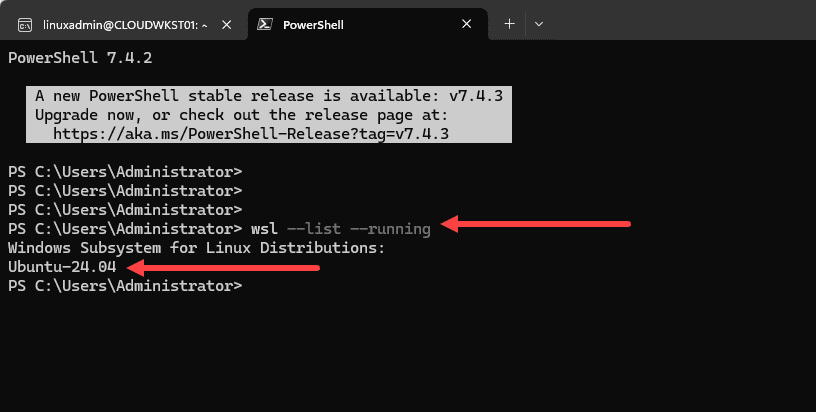
Once you have found the running instance of WSL you want to shutdown, run the command below replacing the instance with your particular instance:
wsl --shutdown Ubuntu-24.04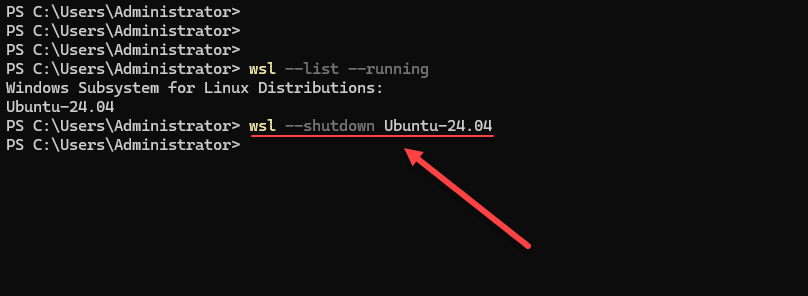
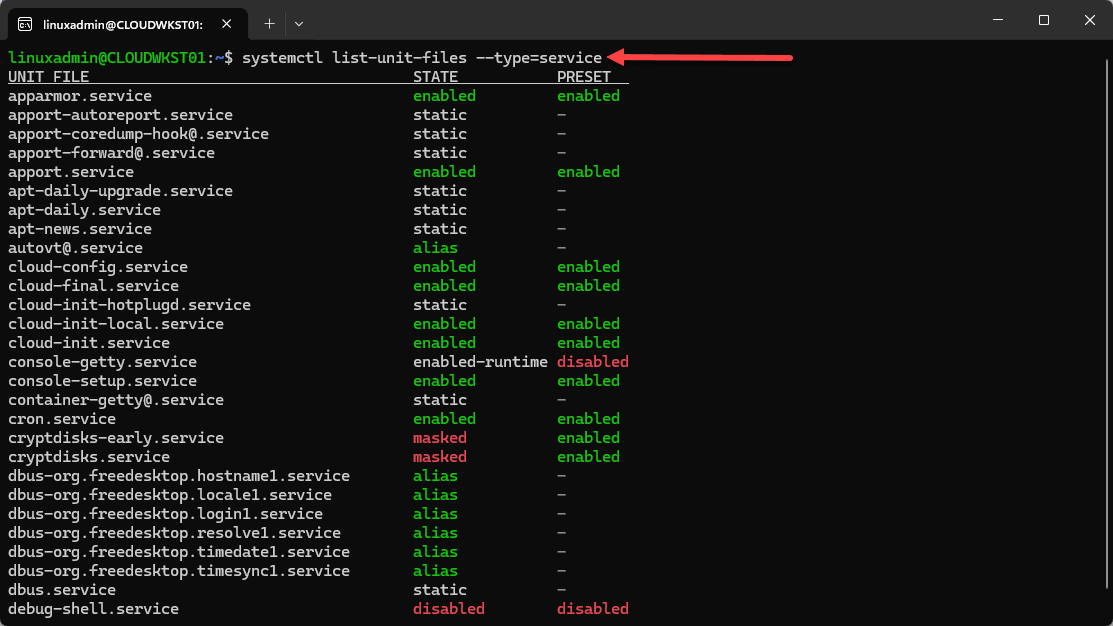
Launch your WSL instance once again and we will verify systemd is installed. You can do that with the command:
systemctl list-unit-files --type=serviceIf you get output, you have successfully initialized systemd.
3. Install Ansible
Ansible is arguably one of the top configuration management tools available and it is easy to get installed into WSL. To install Ansible, you can run the following commands that not only install Ansible but also install other requirements as well as the libkrb5-devand krb5-userpackages that allow you to work with Active Directory joined Kerberos hosts.
sudo apt-get install -y gcc python3-dev libkrb5-dev && \
sudo apt-get install python3-pip -y && \
sudo pip3 install --upgrade pip && \
sudo pip3 install --upgrade virtualenv && \
sudo apt install krb5-user -y && \
sudo pip3 install pywinrm && \
sudo apt install ansible -y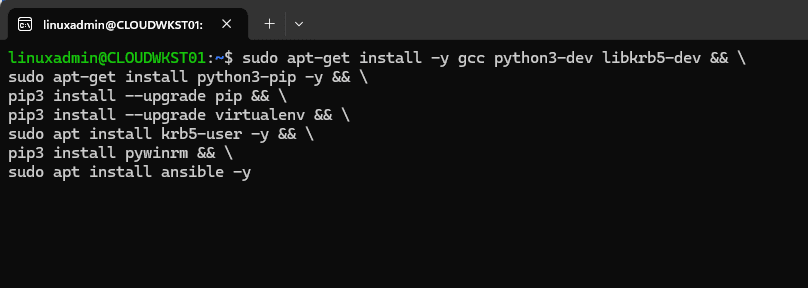
Now, we can check the Ansible version after installation:

4. Persistent Aliases
Next, is persistent aliases. These just make life much easier, especially if you are constantly working with long file paths, etc. We can create short commands that refer to longer commands.
To create a persistent alias, we need to create a special file located in your linux user’s home directory. First let’s create the file:
cd ~
touch .bash_aliases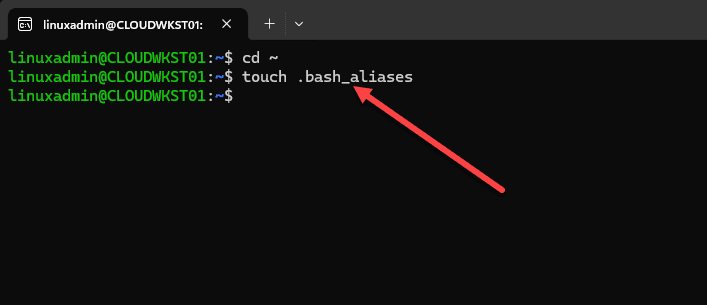
Now we can edit the file:
nano .bash_aliasesTo actually create an alias, you do the following syntax. Below, I am creating an alias for my OneDrive directory path that is 9 miles long so that instead of typine the long directory path, I can instead type the short alias command to get there.
alias ansibledir="cd /mnt/c/Users/Administrator/OneDrive/Documents/ansible/cloudlocal"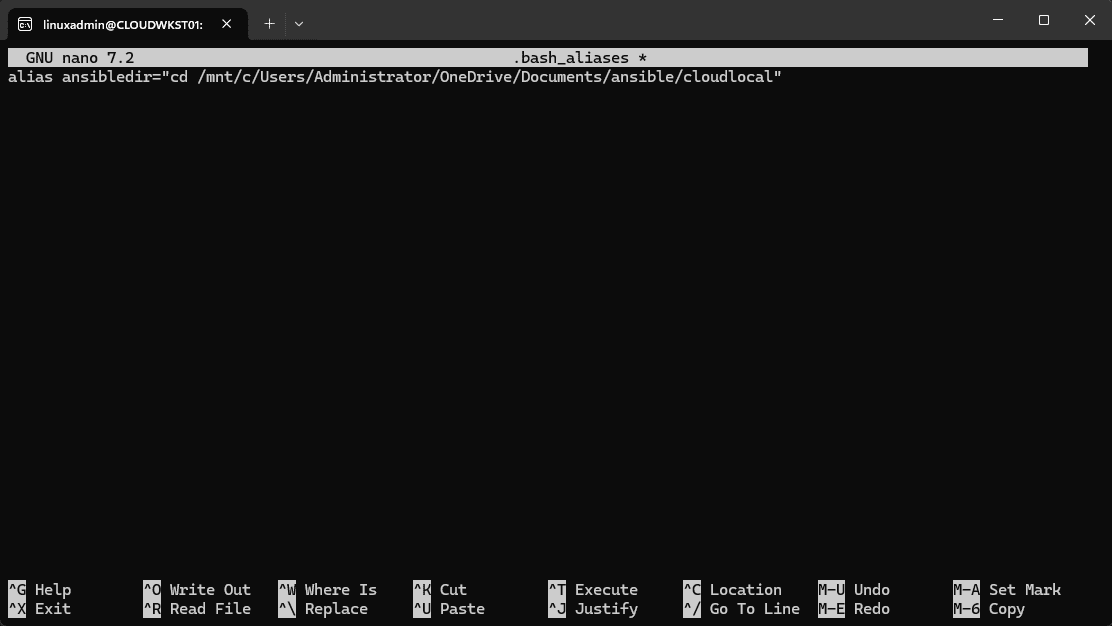
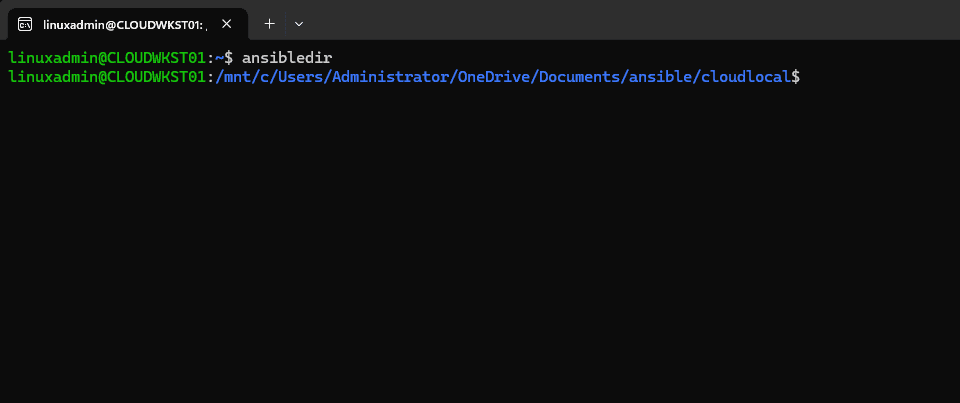
To instantiate the new bash alias, we need to save the file and then close your WSL terminal environment and relaunch it. These aliases don’t become active until we launch WSL again. Once we launch the WSL environment again, we can issue the alias command, and we see it automatically changes to the OneDrive location (long folder path).
5. Install PowerShell
Next, let’s install PowerShell in our Windows Subsystem for Linux environment. PowerShell is a powerful scripting language that is now multi-platform and can be run in Windows and Linux, using the PowerShell Core installation. Let’s see how we can install PowerShell inside our WSL environment.
The command needed are the following looking at is the following:
sudo snap install powershell --classic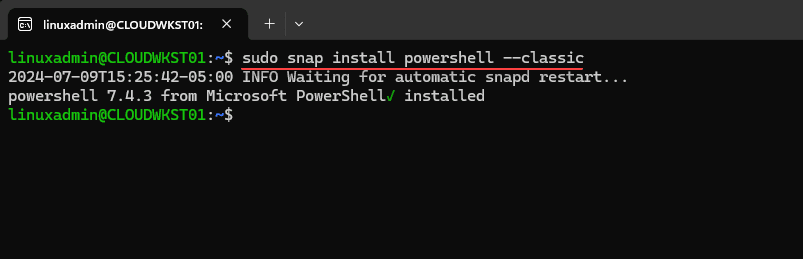
After it is installed, you can launch PowerShell using the cmd:
pwsh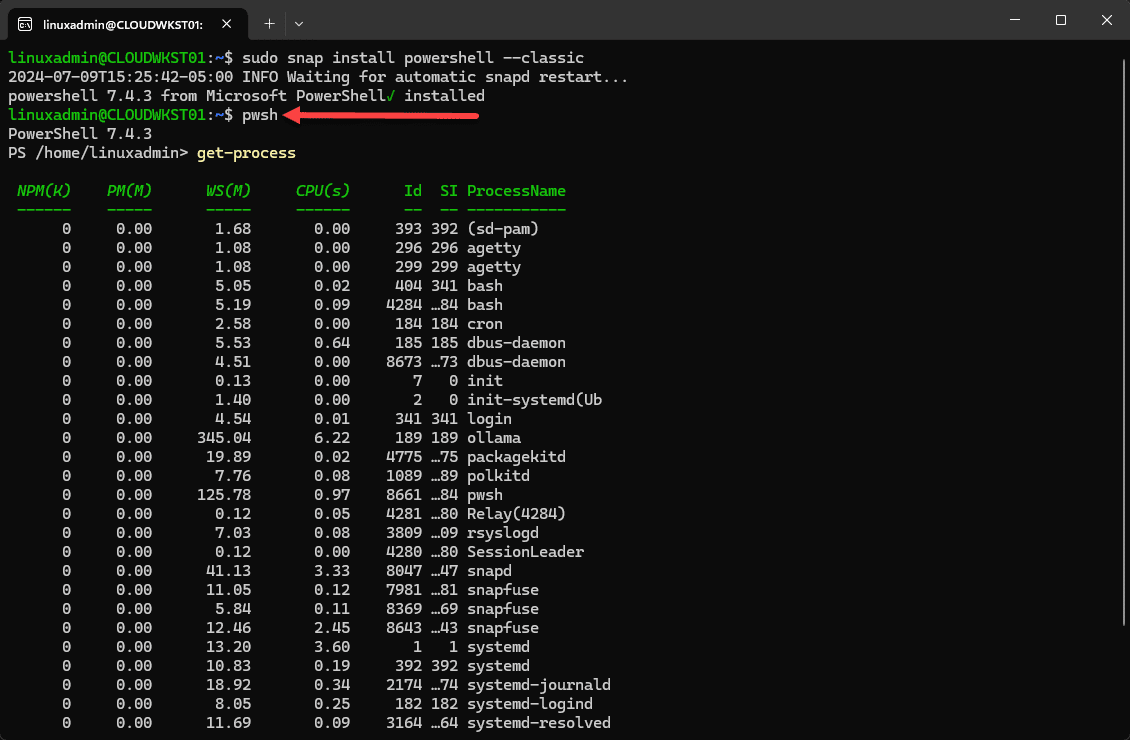
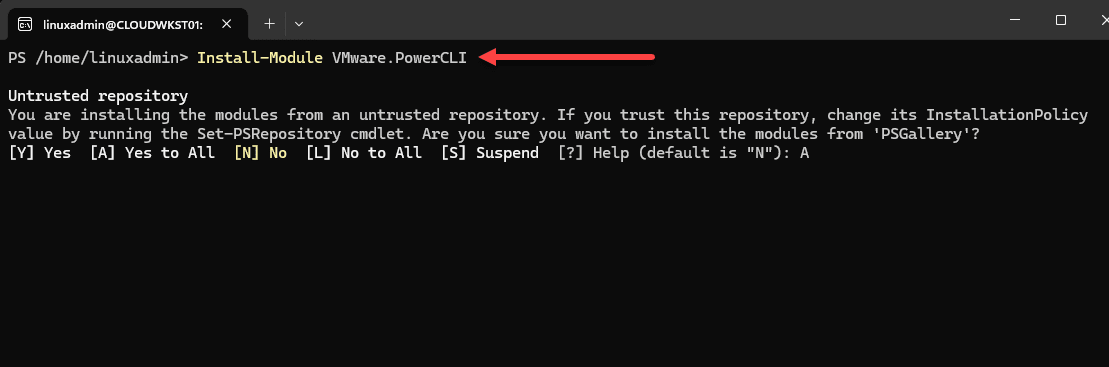
6. Add VMware PowerCLI module
If you work with VMware vSphere environments like I do, you will want to have the VMware PowerShell module installed. To install it, you can issue the cmdlet:
Install-Module VMware.PowerCLIConfirm the installation of the VMware PowerCLI module.
We can verify the VMware.PowerCLI module is installed by issuing some commands in the PowerShell instance in Windows Subsystem for Linux:
connect-viserver <your vcenter or ESXi hostname or IP>
7. Copying files between WSL and Windows
Another handy tweak and trick to know is copying files between WSL and Windows. You can do this with the simple command at the Windows Subsystem for Linux bash shell and it will open the Windows explorer focused on the directory from which you run the command:
explorer.exe .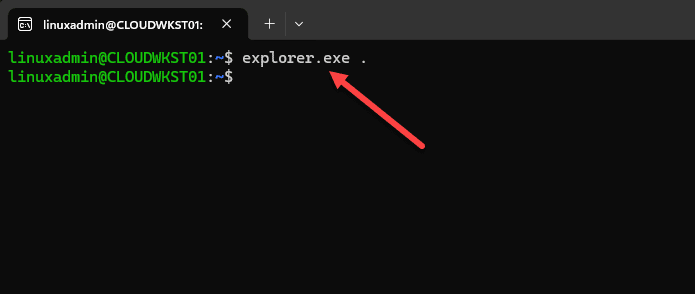
This will launch a Windows Explorer window where you will be able to browse your Windows Subsystem for Linux files and directories from Windows Explorer! Definitely cool.
8. Installing Kubernetes
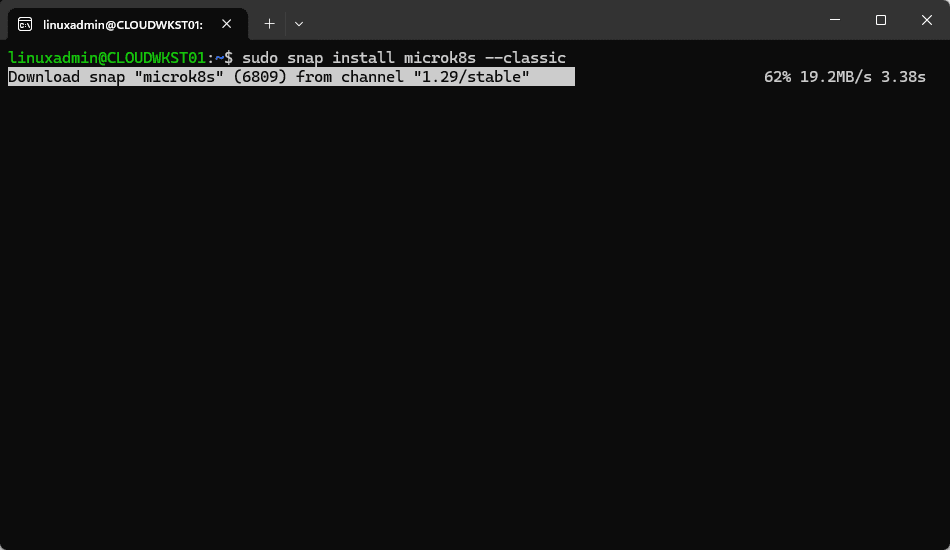
With systemd installed, we can install Microk8s. To install Microk8s, you can use the following command:
To get the status of the Microk8s installation, run the following command:
sudo microk8s status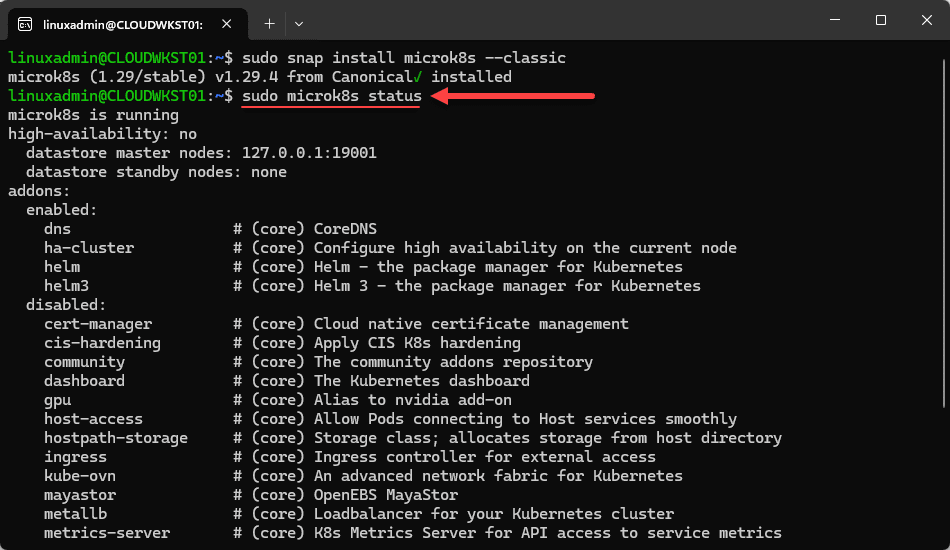
Wrapping up
Hopefully these Windows Subsystem for Linux tweaks tips, and hacks with Windows Subsystem for Linux (WSL) are things you can benefit from. The WSL environment is very powerful and can do many different things when you have the right tools installed. As we have shown, you can do things like run systemd, install Ansible, and run a Kubernetes cluster. Let me know in the comments if there are other tweaks and cool things you like to do with your WSL installations.
Congrats Brandon on starting and providing another tech resource (tek2cloud) to vCommunity. You’re such a great inspiration for all of us 😊.
Thank you Nisar! I appreciate that as well as all the resources you provide as well. Take care my friend.
Brandon